How to create marketing images in bulk with Google Sheets
If you’re making a lot of template-based marketing images (or any type of visuals based on a repeating design where you change texts, background images, or colors), you can automate the manually-intensive process by using Google Sheets and Robolly (an affordable image automation platform). No coding required.
In this guide, I’ll show you step-by-step how to automate the production of marketing banners for social media in multiple versions (Instagram, Instagram Stories, Twitter fleet, etc.) for an upcoming conference event.
How will it work?
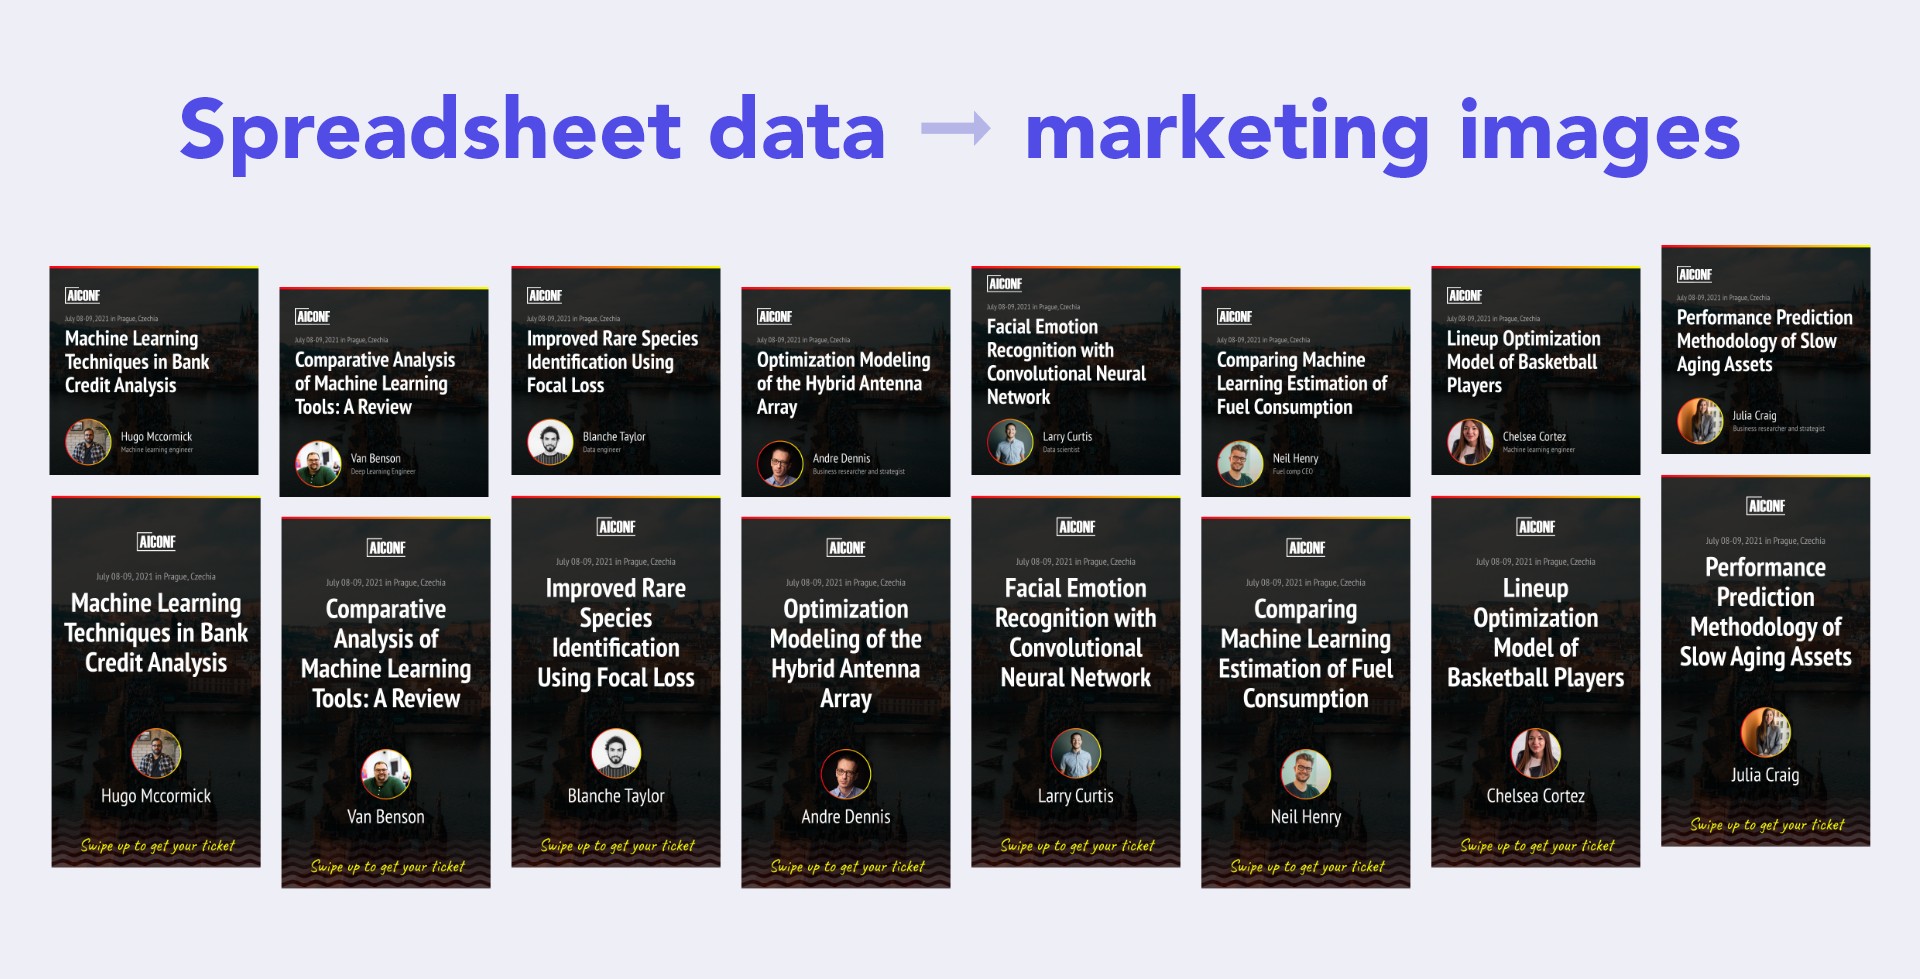
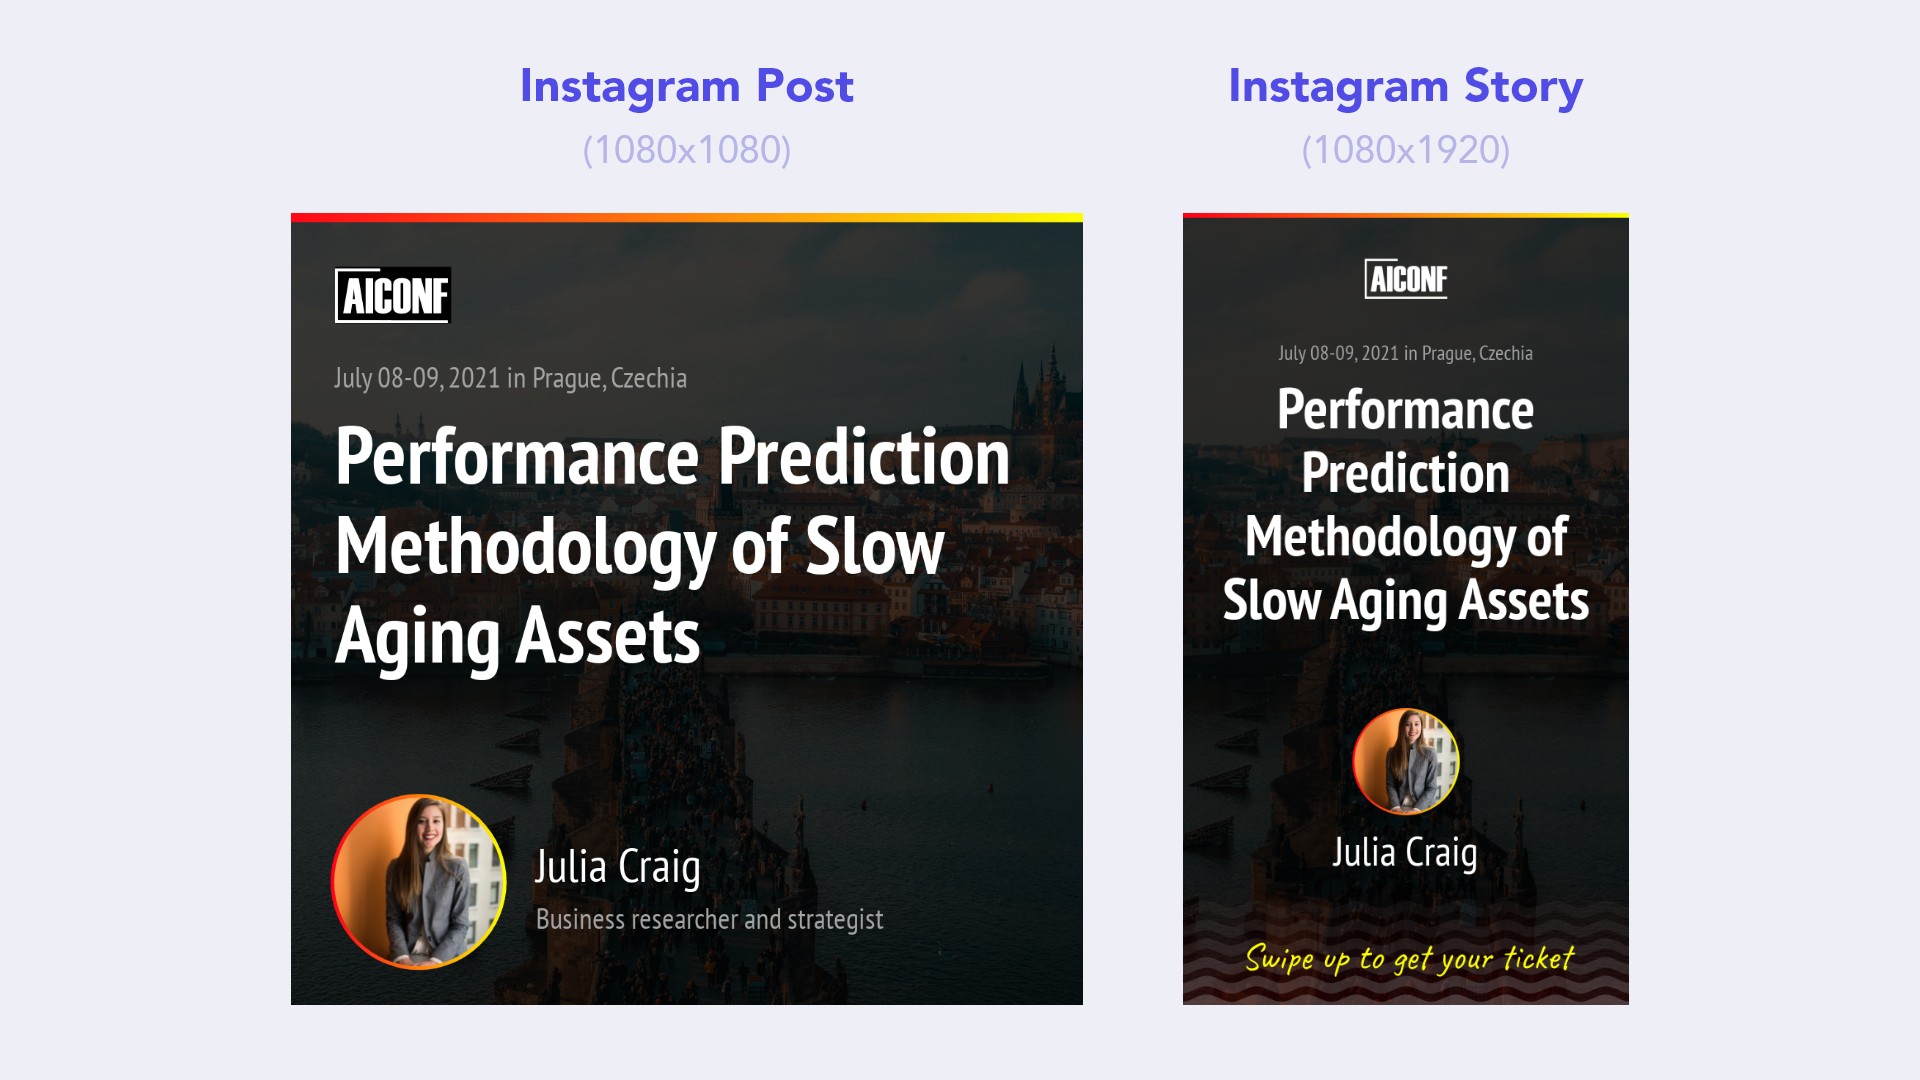
I’ll create a promo image for every speaker’s talk. There will be ten speakers, which means I need to create ten images in two variants (one for Instagram post; the second for Instagram Story). In total, twenty unique images based on two different templates -- a template can have any size, and it’s completely up to you how it looks.
In Robolly, I designed the templates to show the following information: talk title, event date, speaker name, speaker description, speaker image, and location-specific background:
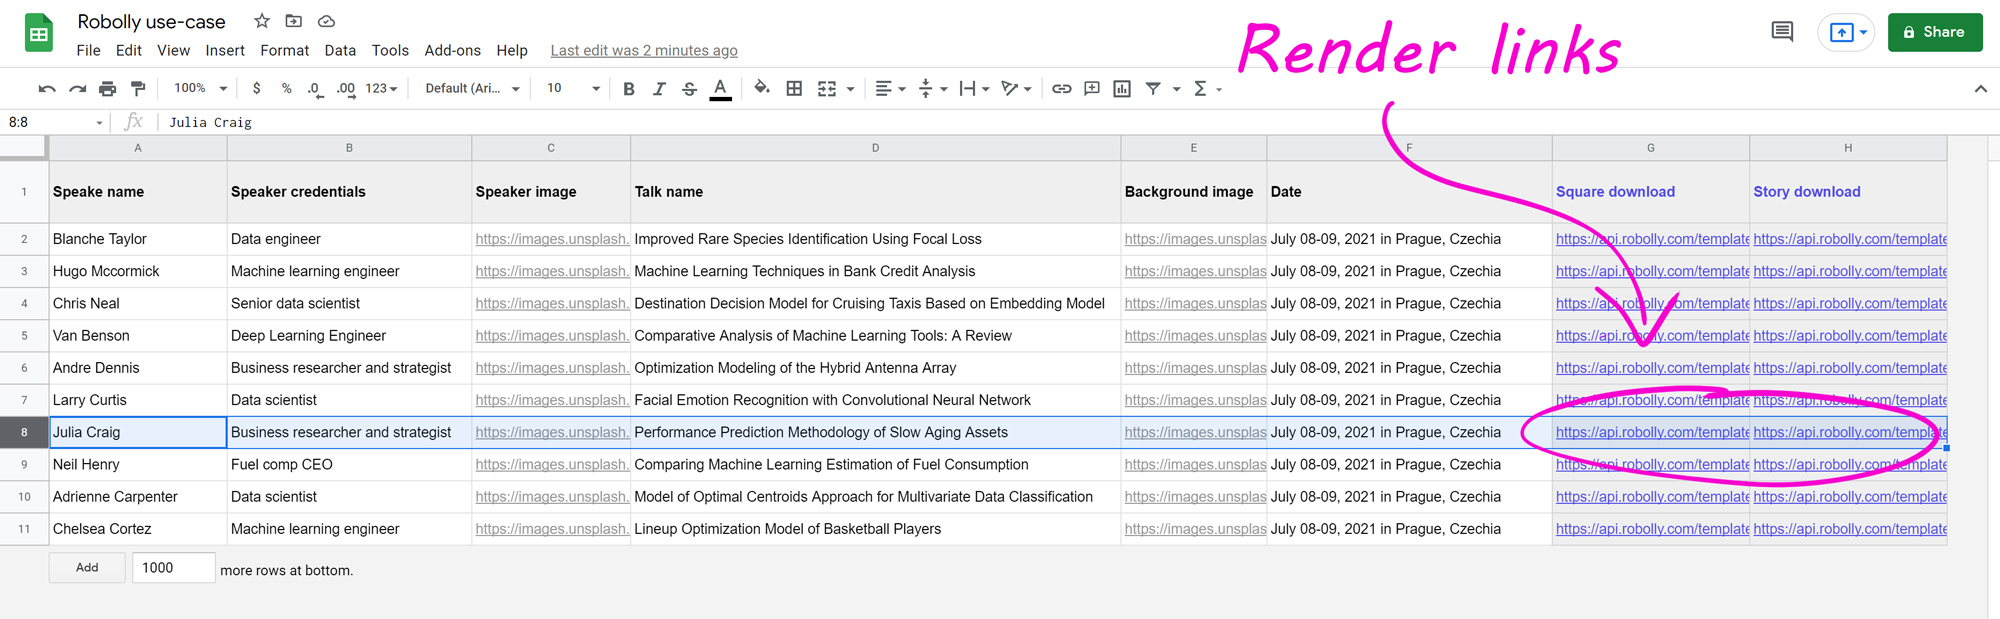
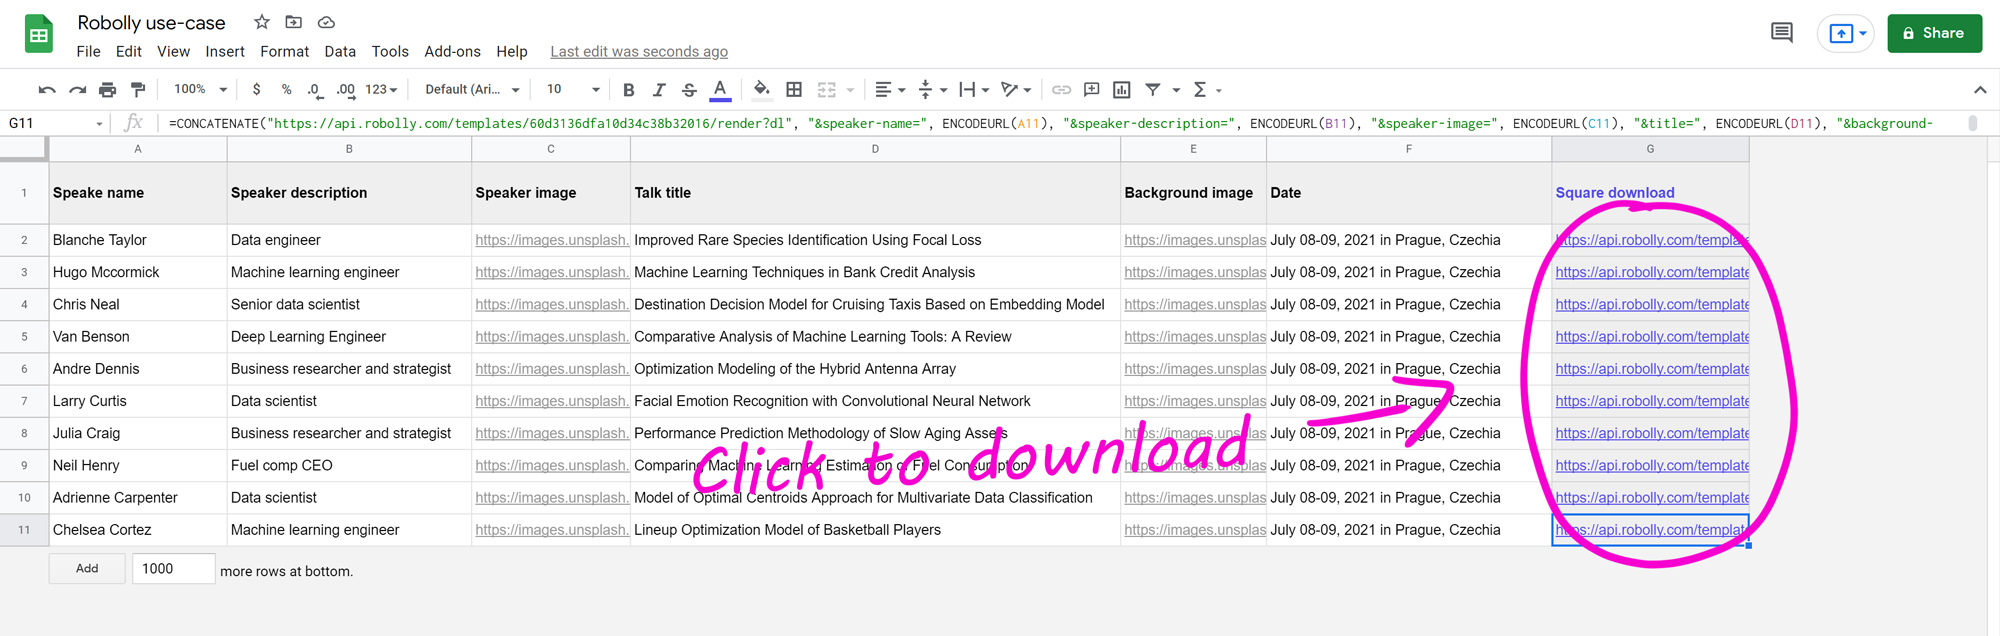
Then to download the promo images (rendered based on my templates), all I have to do is to put all the data (talk title, event date, etc.) into the spreadsheet, and click on the render links. Producing more promo images (for future conference events) is just a matter of adding more rows of data into the spreadsheet:
Prerequisites
You’ll need a Google account to create a spreadsheet in Google Sheets and a Robolly account to create the templates and access the image generation API (you can sign up for a free trial).
Step 1: Robolly setup
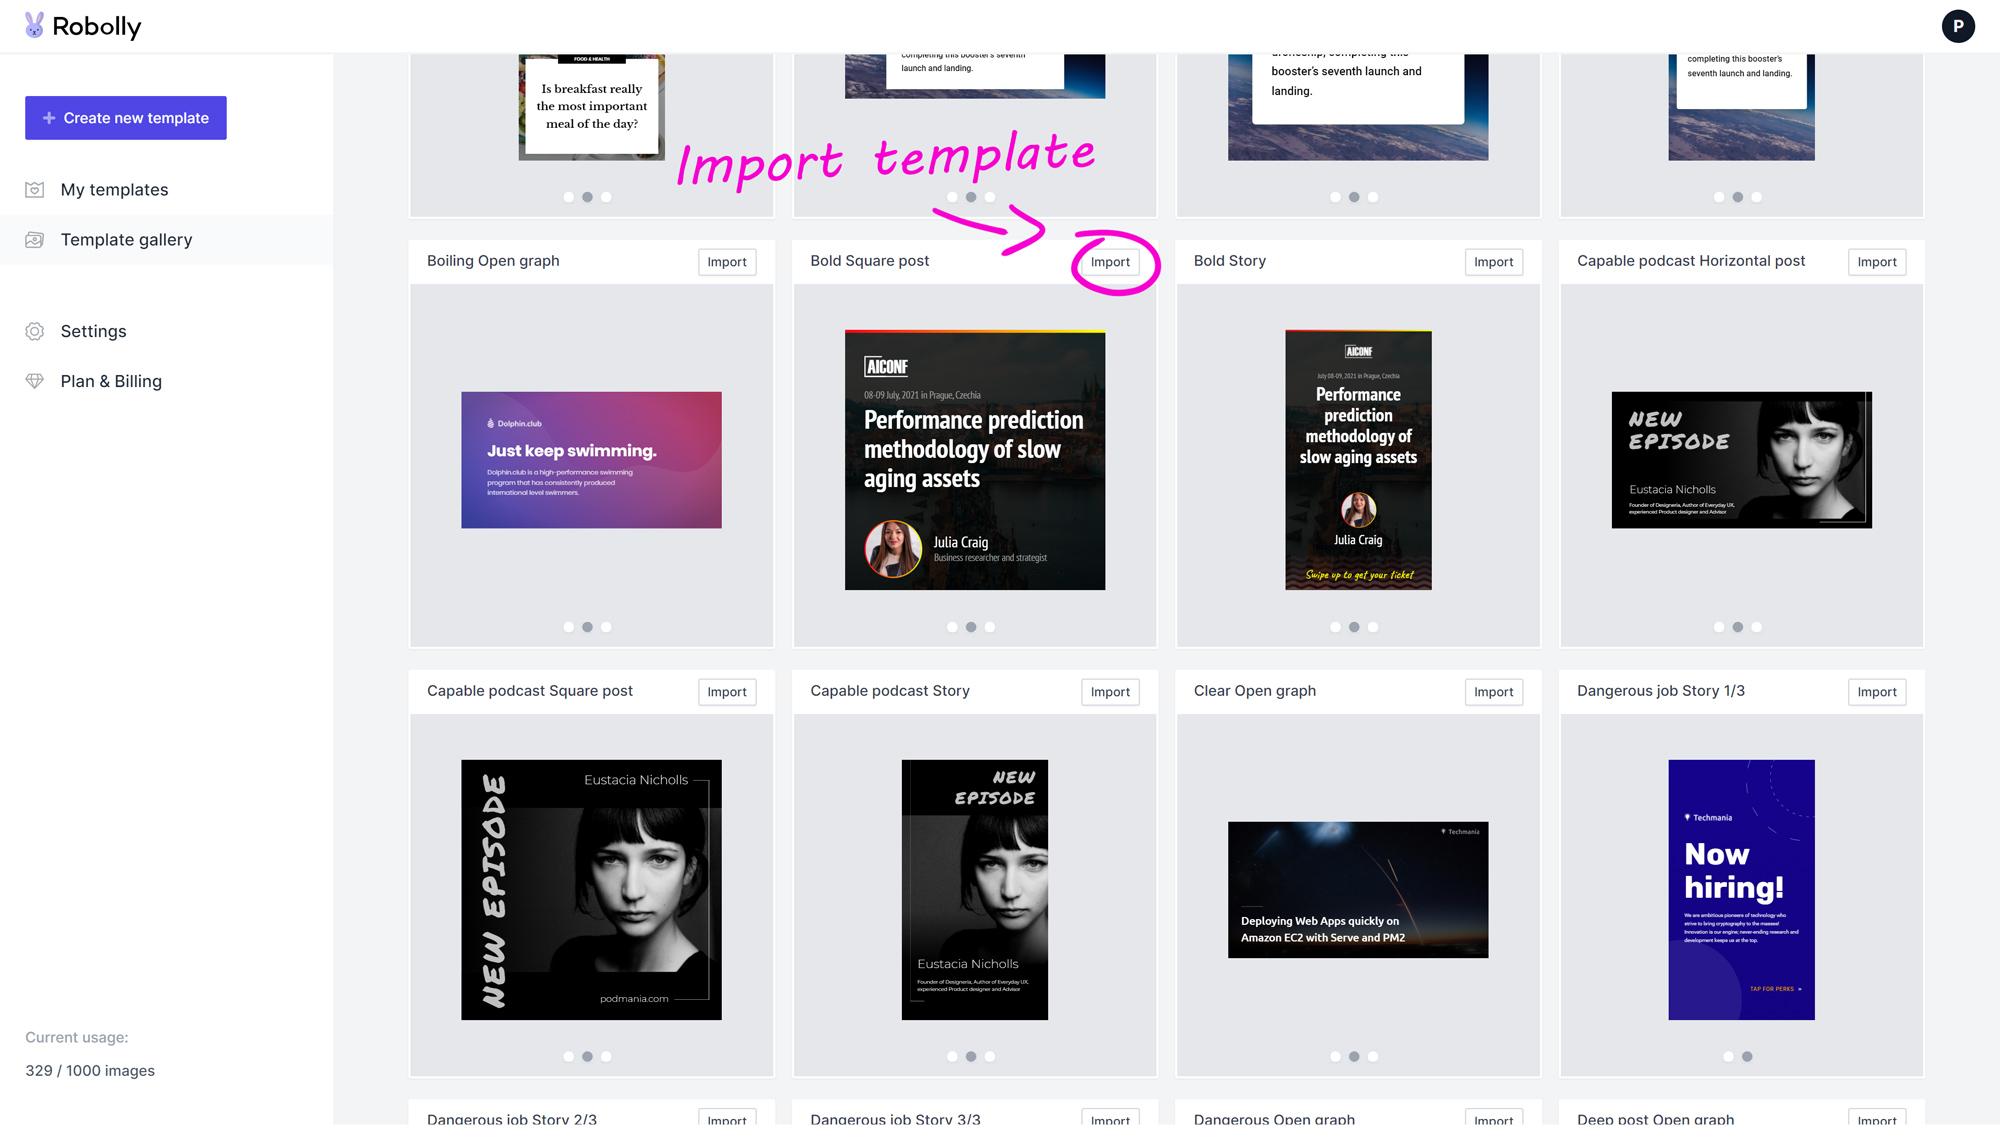
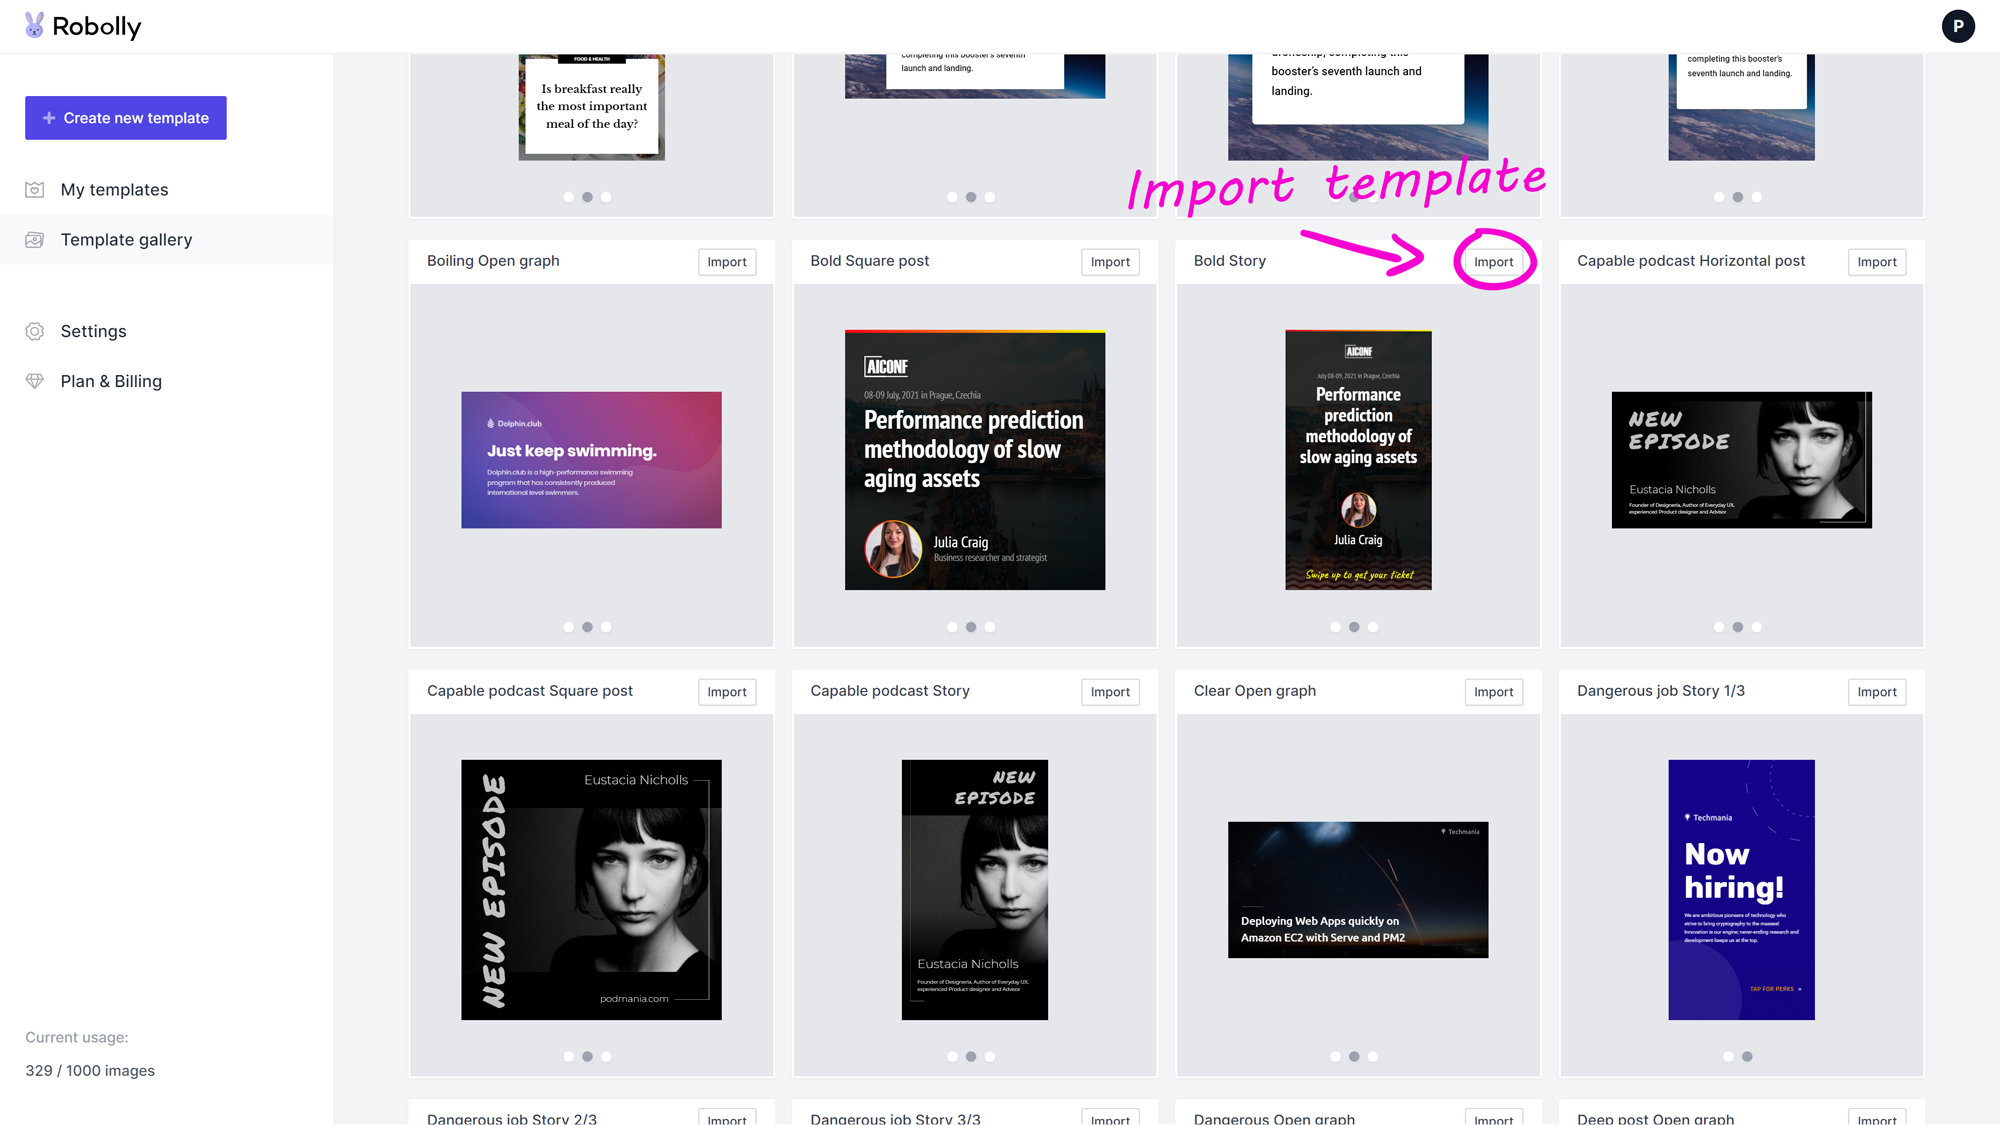
First, you’ll need to prepare a template in Robolly. I added the two templates that I’ll be using in this tutorial into Robolly’s template gallery, so you can import them with one click (alternatively, you could design one from scratch if your use-case differs). We’ll start with the template called “Bold Square post” which is meant for an Instagram post.
Let’s start by opening Robolly’s template gallery:
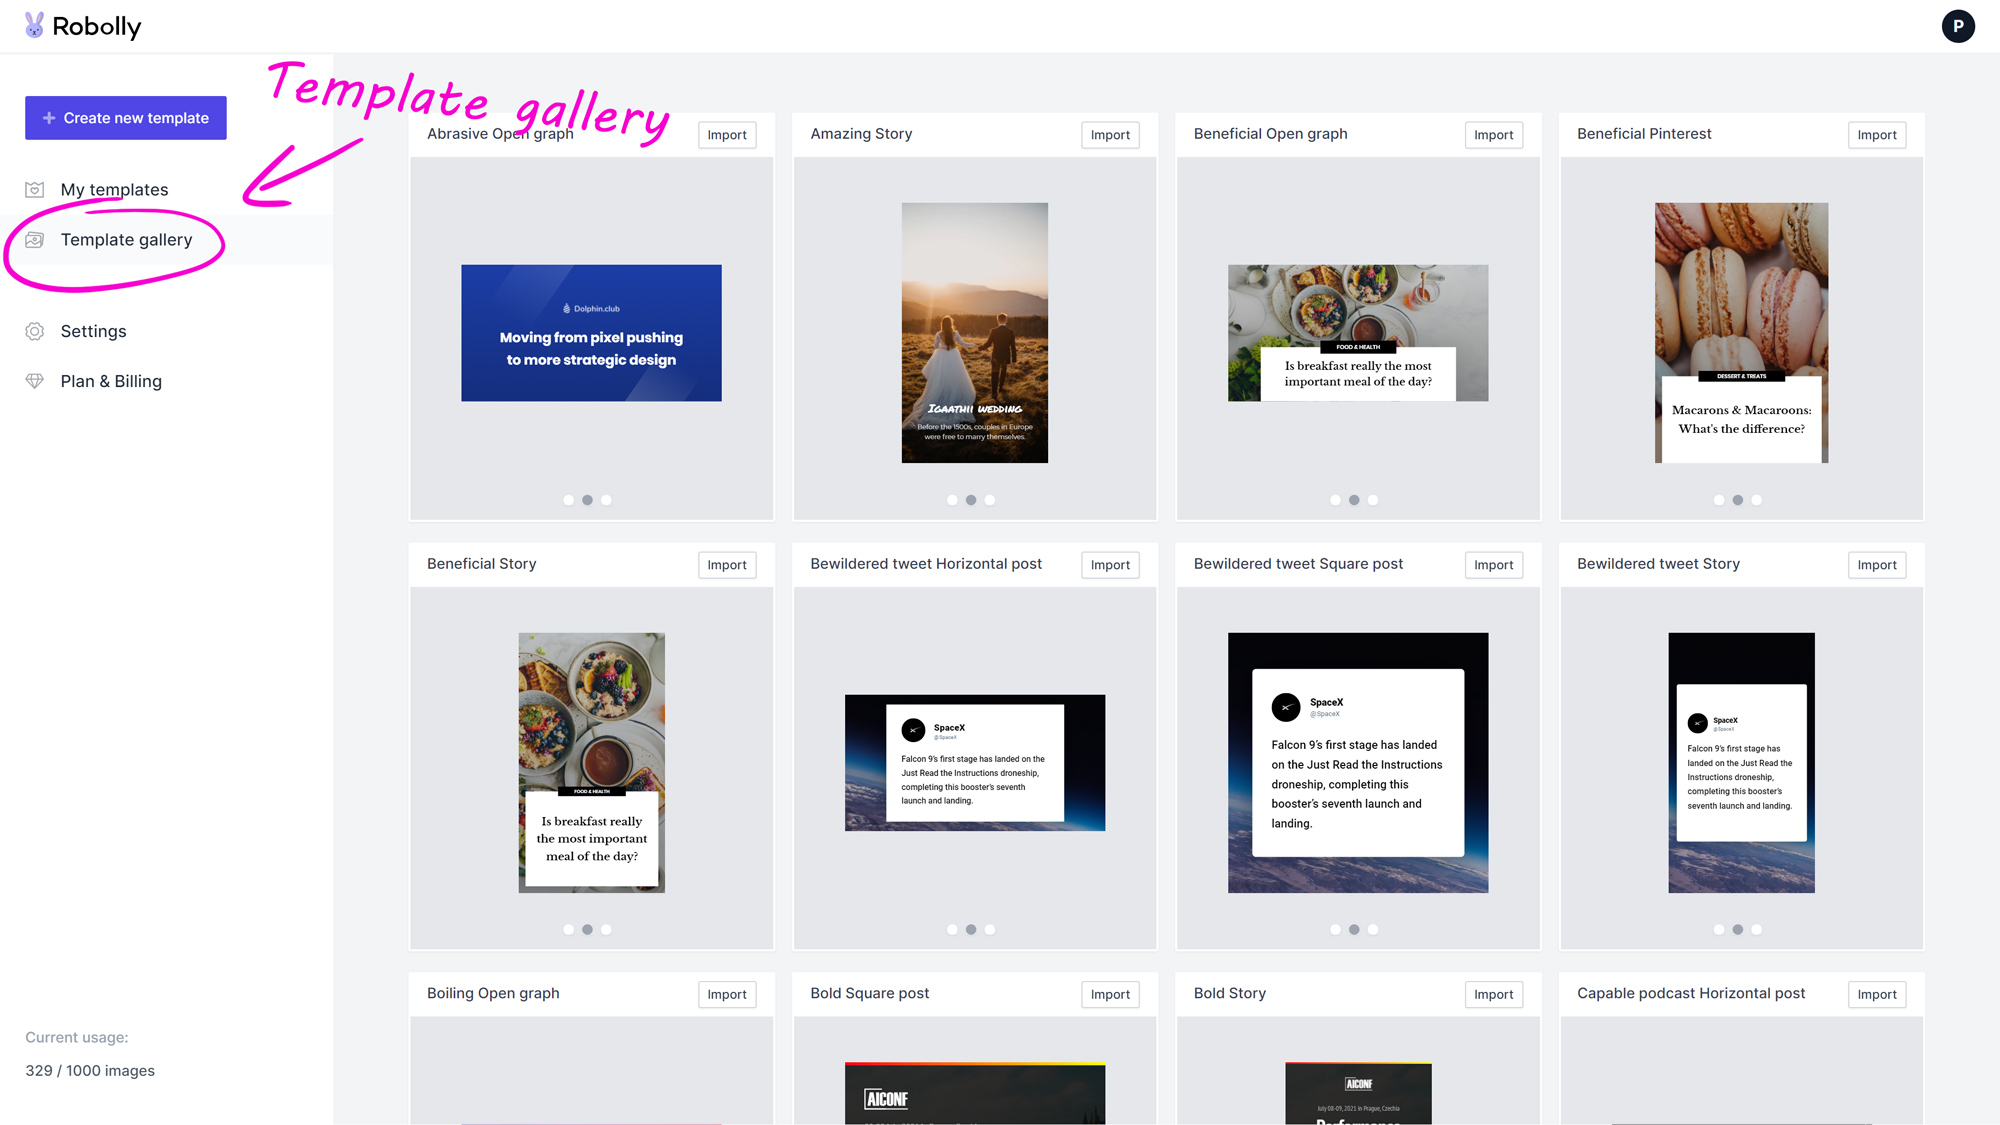
In the template gallery, find the template “Bold Square post”. Click import:
After the template is successfully imported, you’ll get redirected to the template’s render tab. Conveniently, the render tab contains everything we need for the Google Sheet integration. But more on that later, because the next step is to create the spreadsheet.
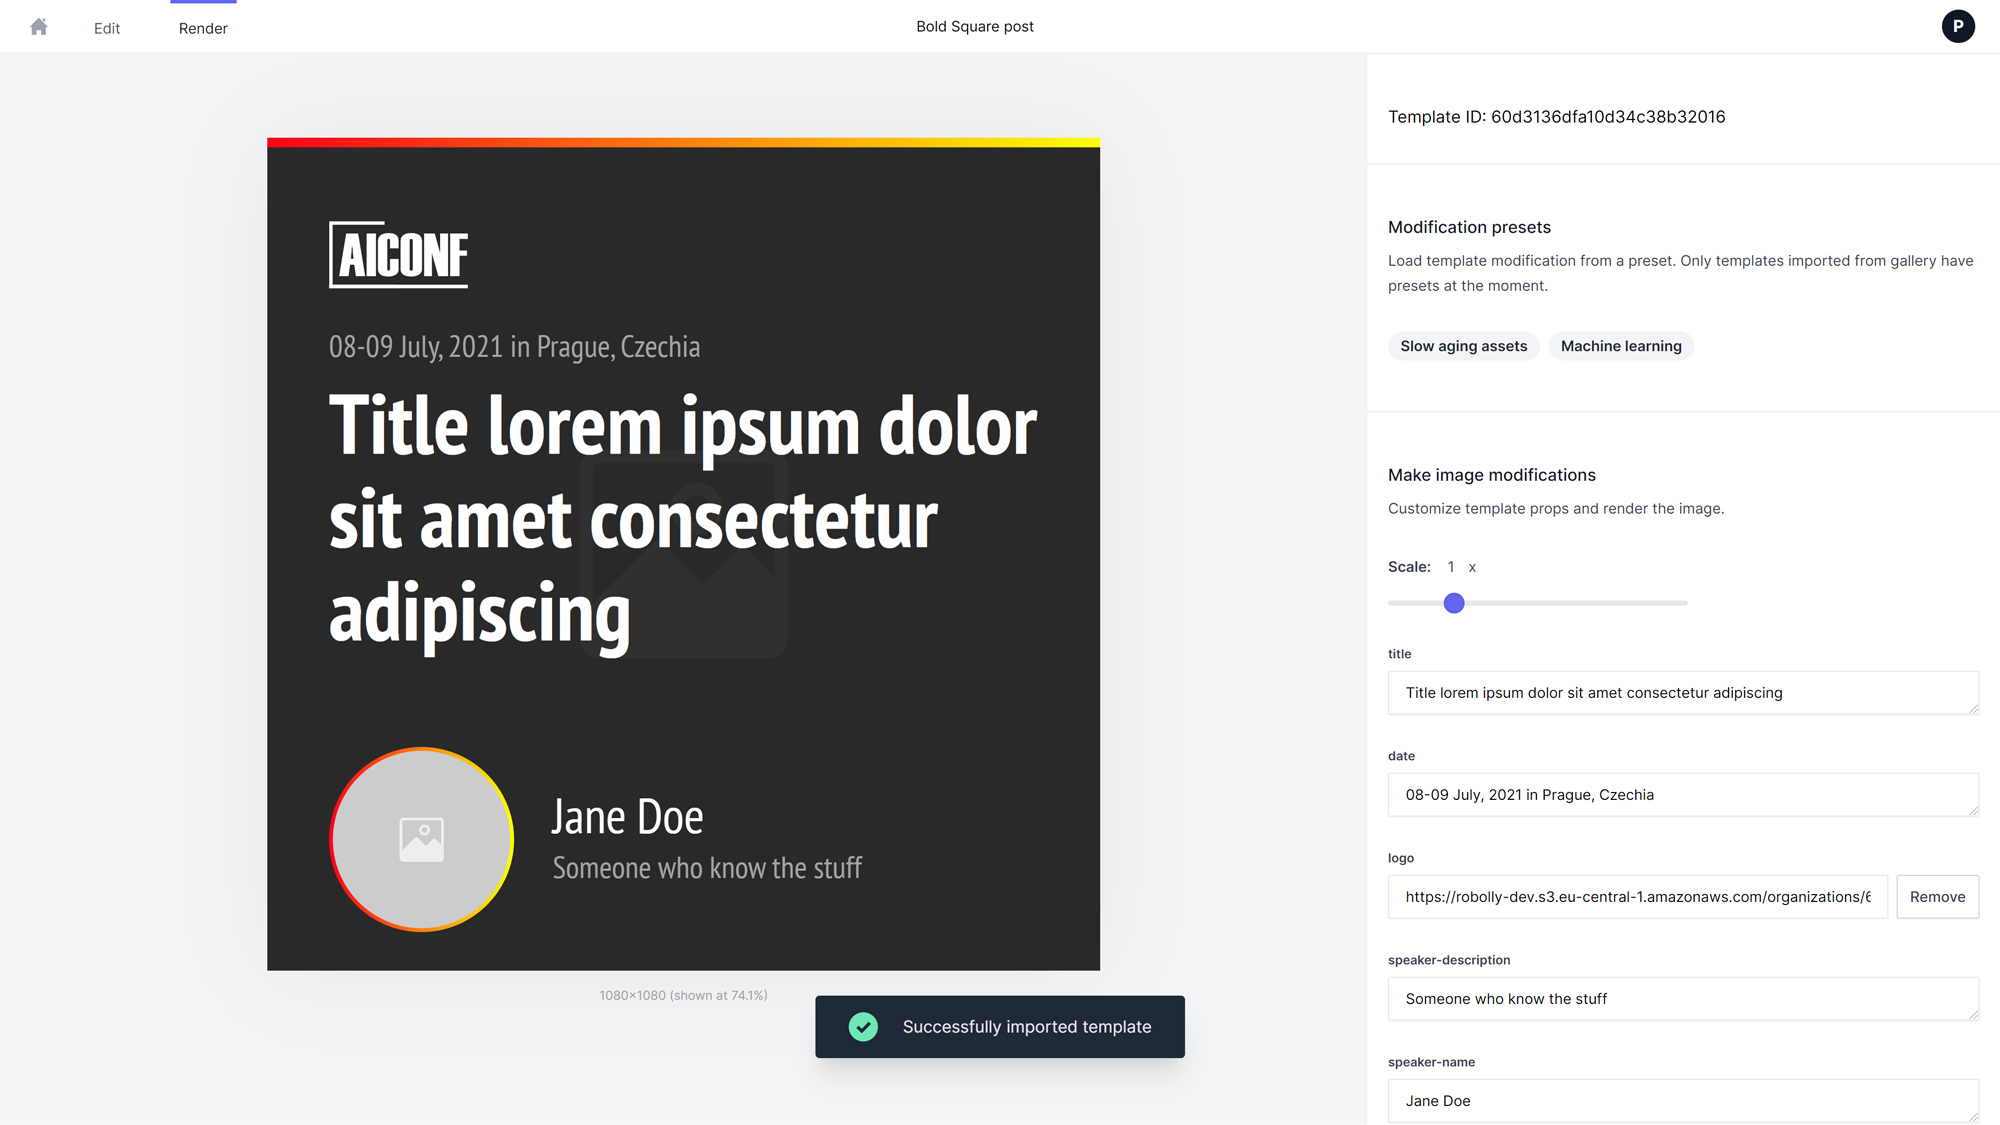
Before we go onto the next step, if you want to make changes to the imported template, switch into edit mode in the top left corner. You can edit the imported template however you like, for example, add your company’s logo.
Step 2: Creating the spreadsheet
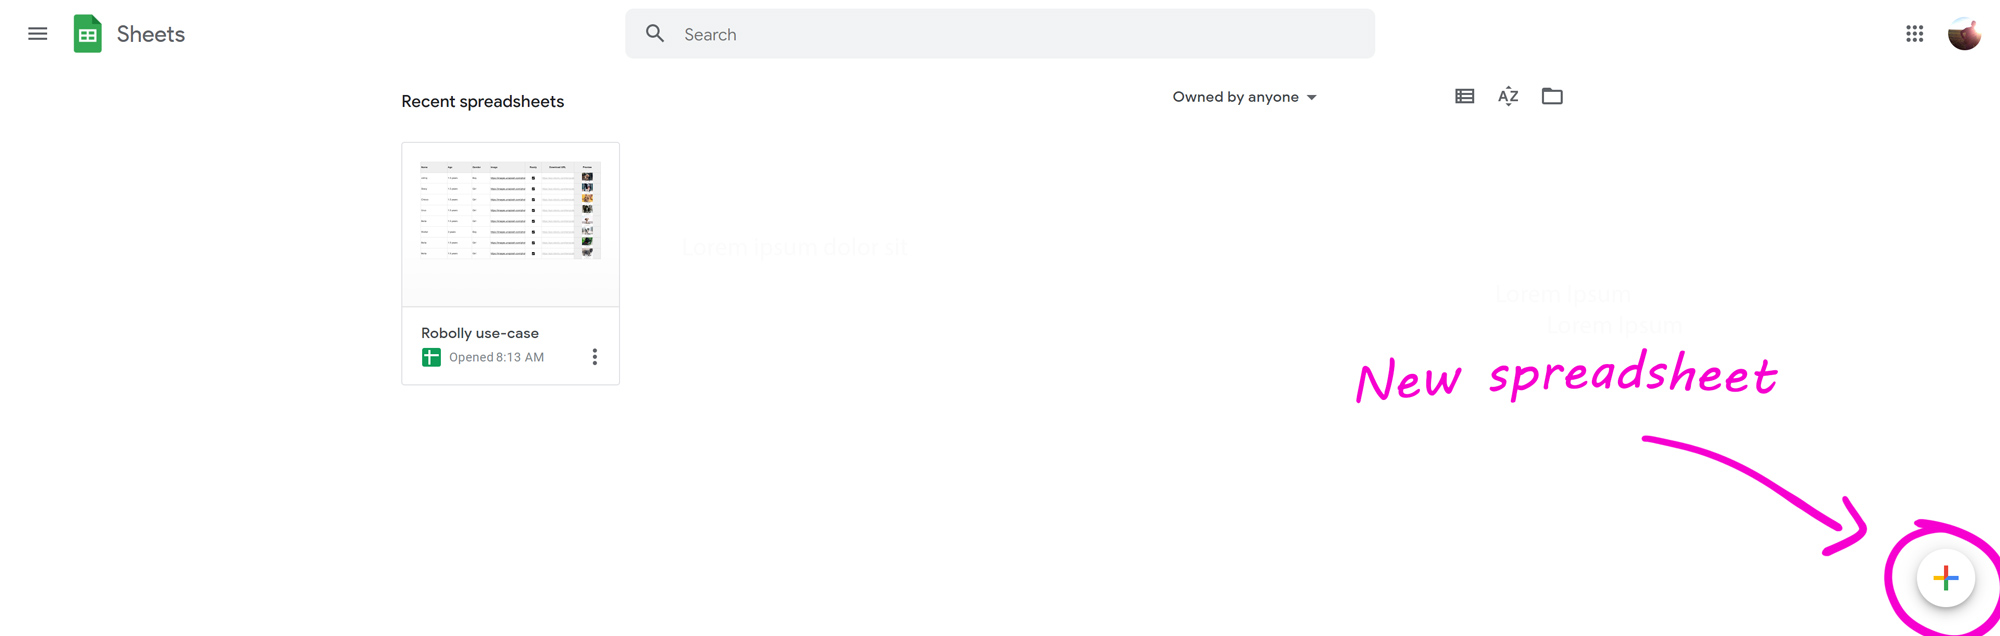
Open Google sheets in a new tab, and create a brand new spreadsheet.
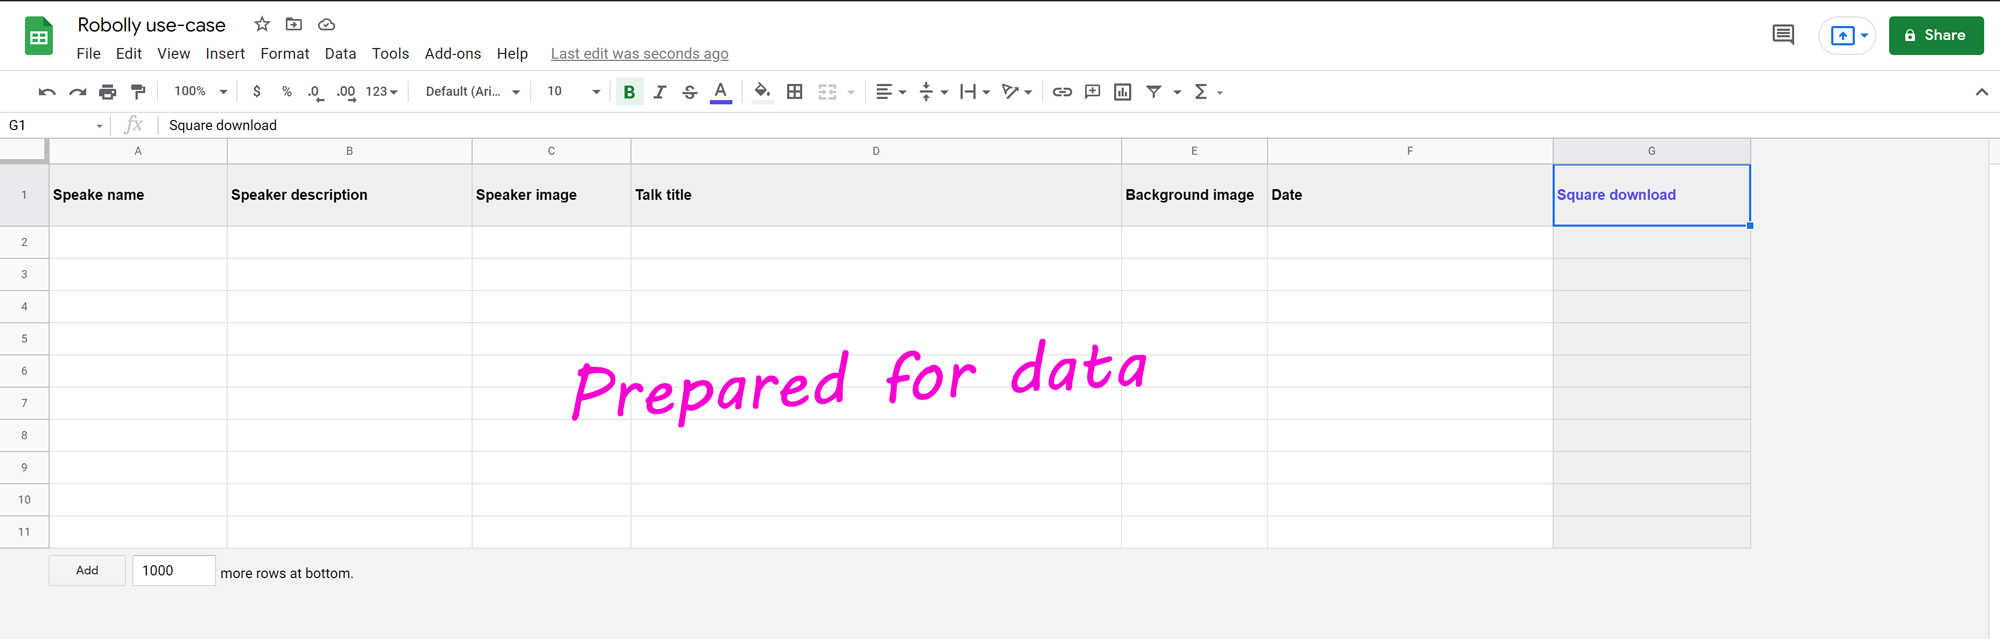
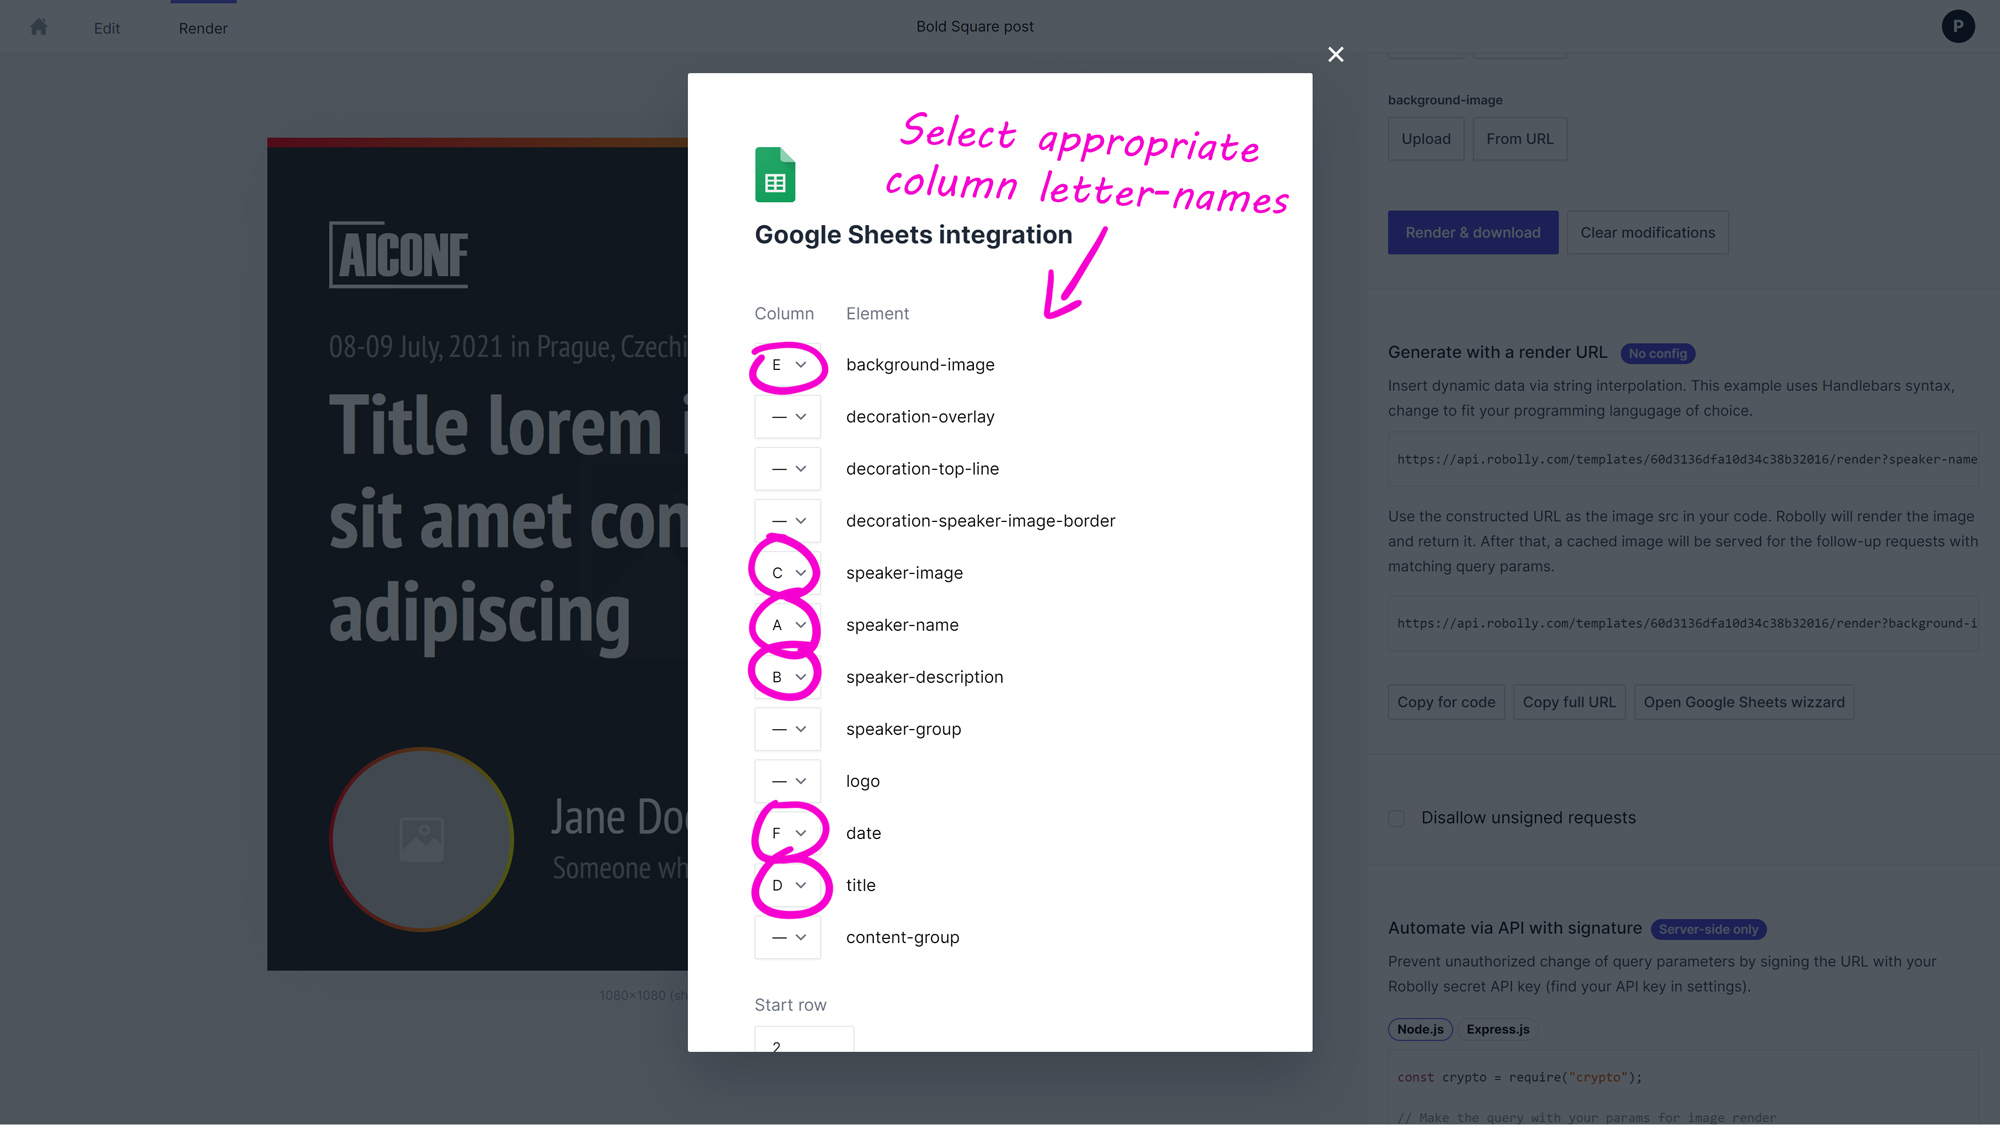
Next, designate corresponding columns to those template’s elements that should receive modifications. For the “Bold Square post” template, it’s the following elements: spreaker-name, speaker-description, speaker-image, title, background-image, and date.
Create the corresponding columns:

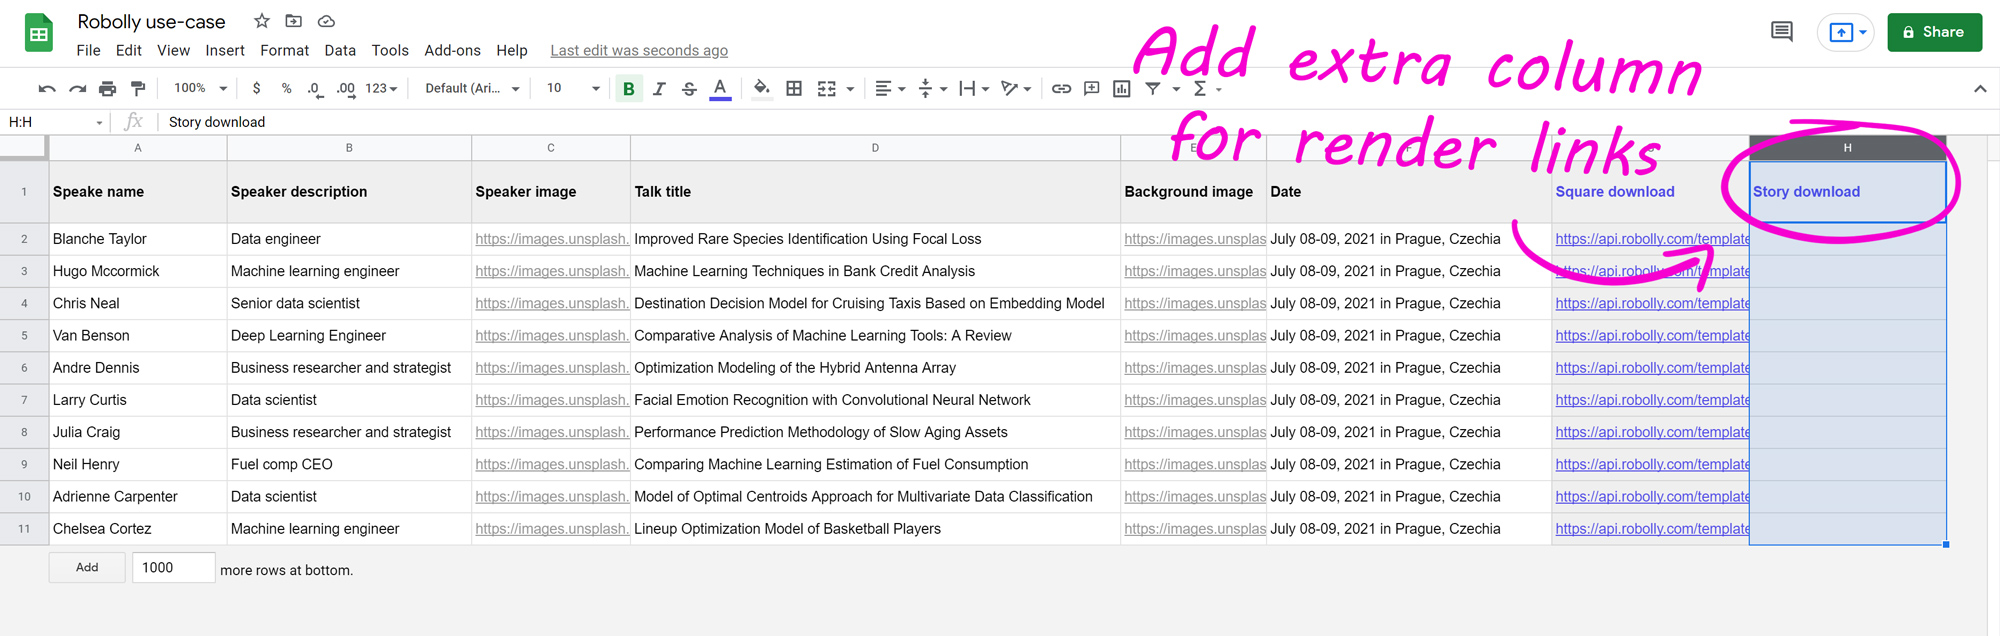
Next, add an extra column for the render links. Later, we’ll insert a formula that will automatically make the render links based on cell data in the same row.
For now, prepare the extra column (I labeled it “Square download”):

With columns prepared, the spreadsheet structure is complete. To stay organized, you can remove the unnecessary columns, rows, and add some colors.
A spreadsheet structure prepared for data:
Step 3: Filling in data
Now, fill in the data that will be passed into the template to produce the promo images (you can grab the conference sample data here).
Note that it’s required to use publicly accessible image links for image-type elements (in the conference example, it’s “background” and “speaker-image”). You can use Google Drive, Dropbox, or any other cloud storage service that allows you to get public sharing links.

Get public image links from Google Drive (optional)
To get a public link to an image stored in Google Drive, right-click on the image and then select “Get link”.
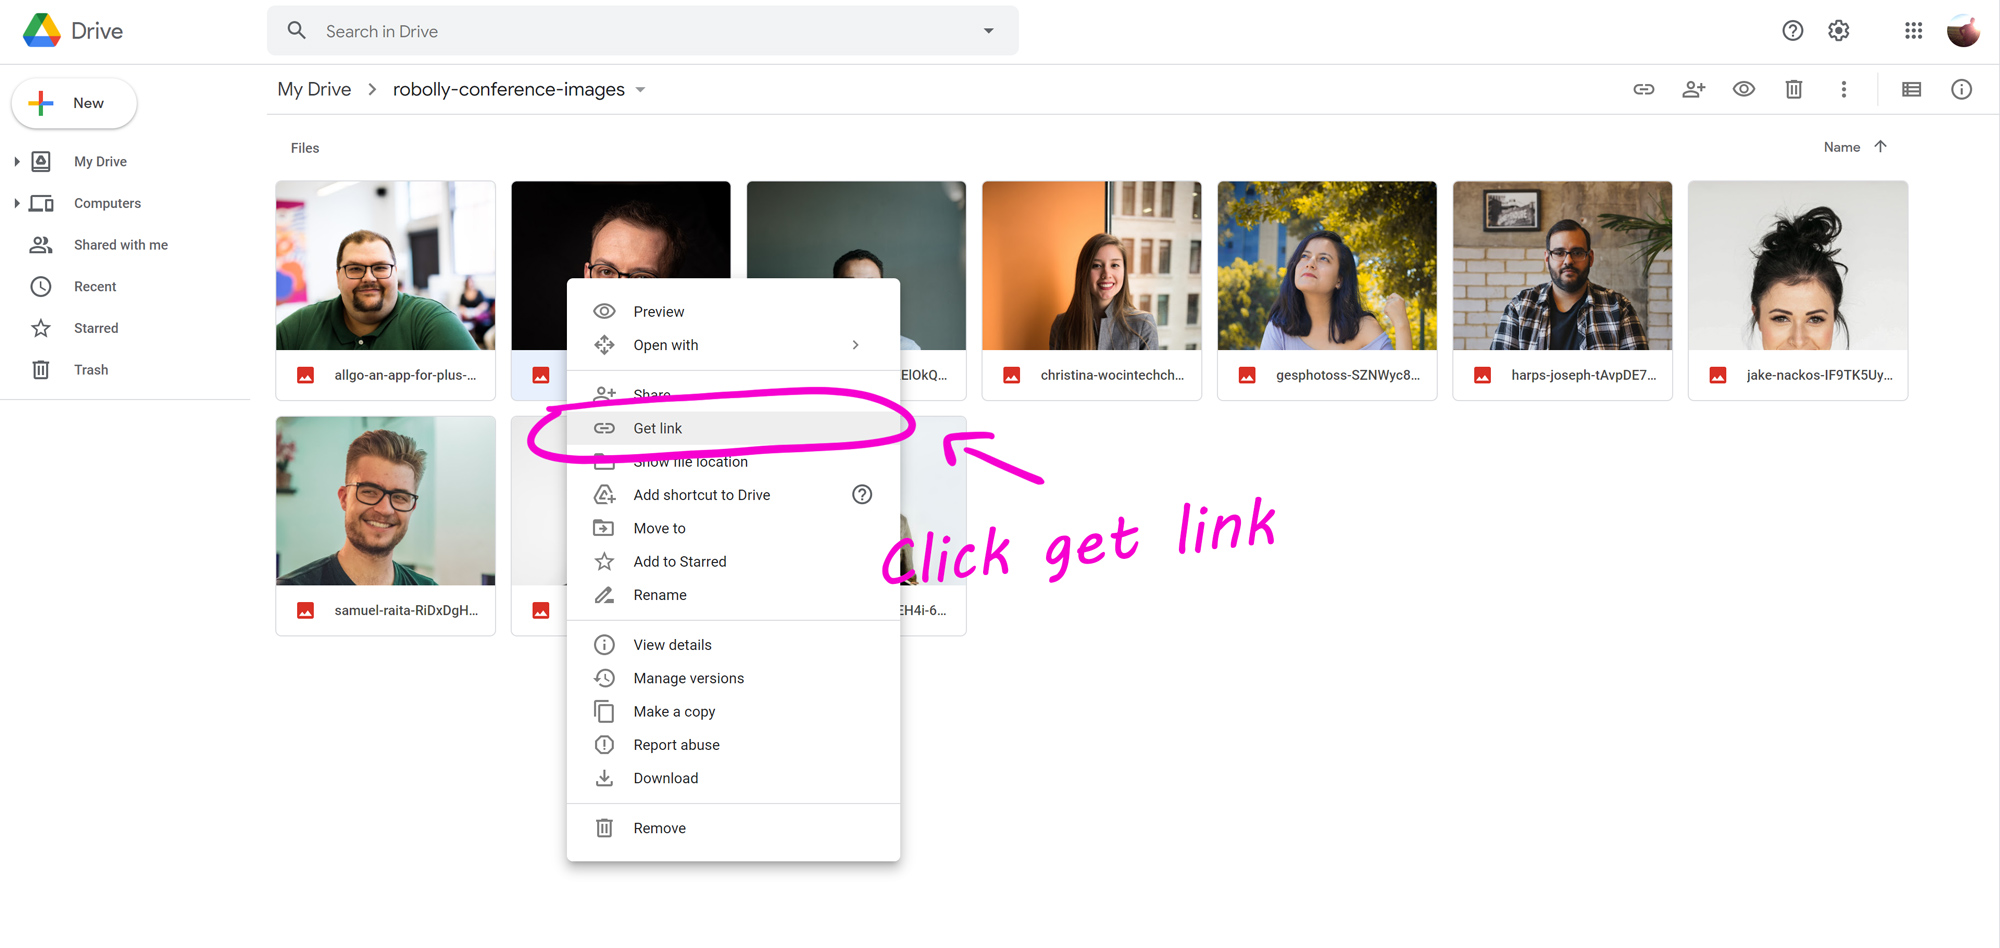
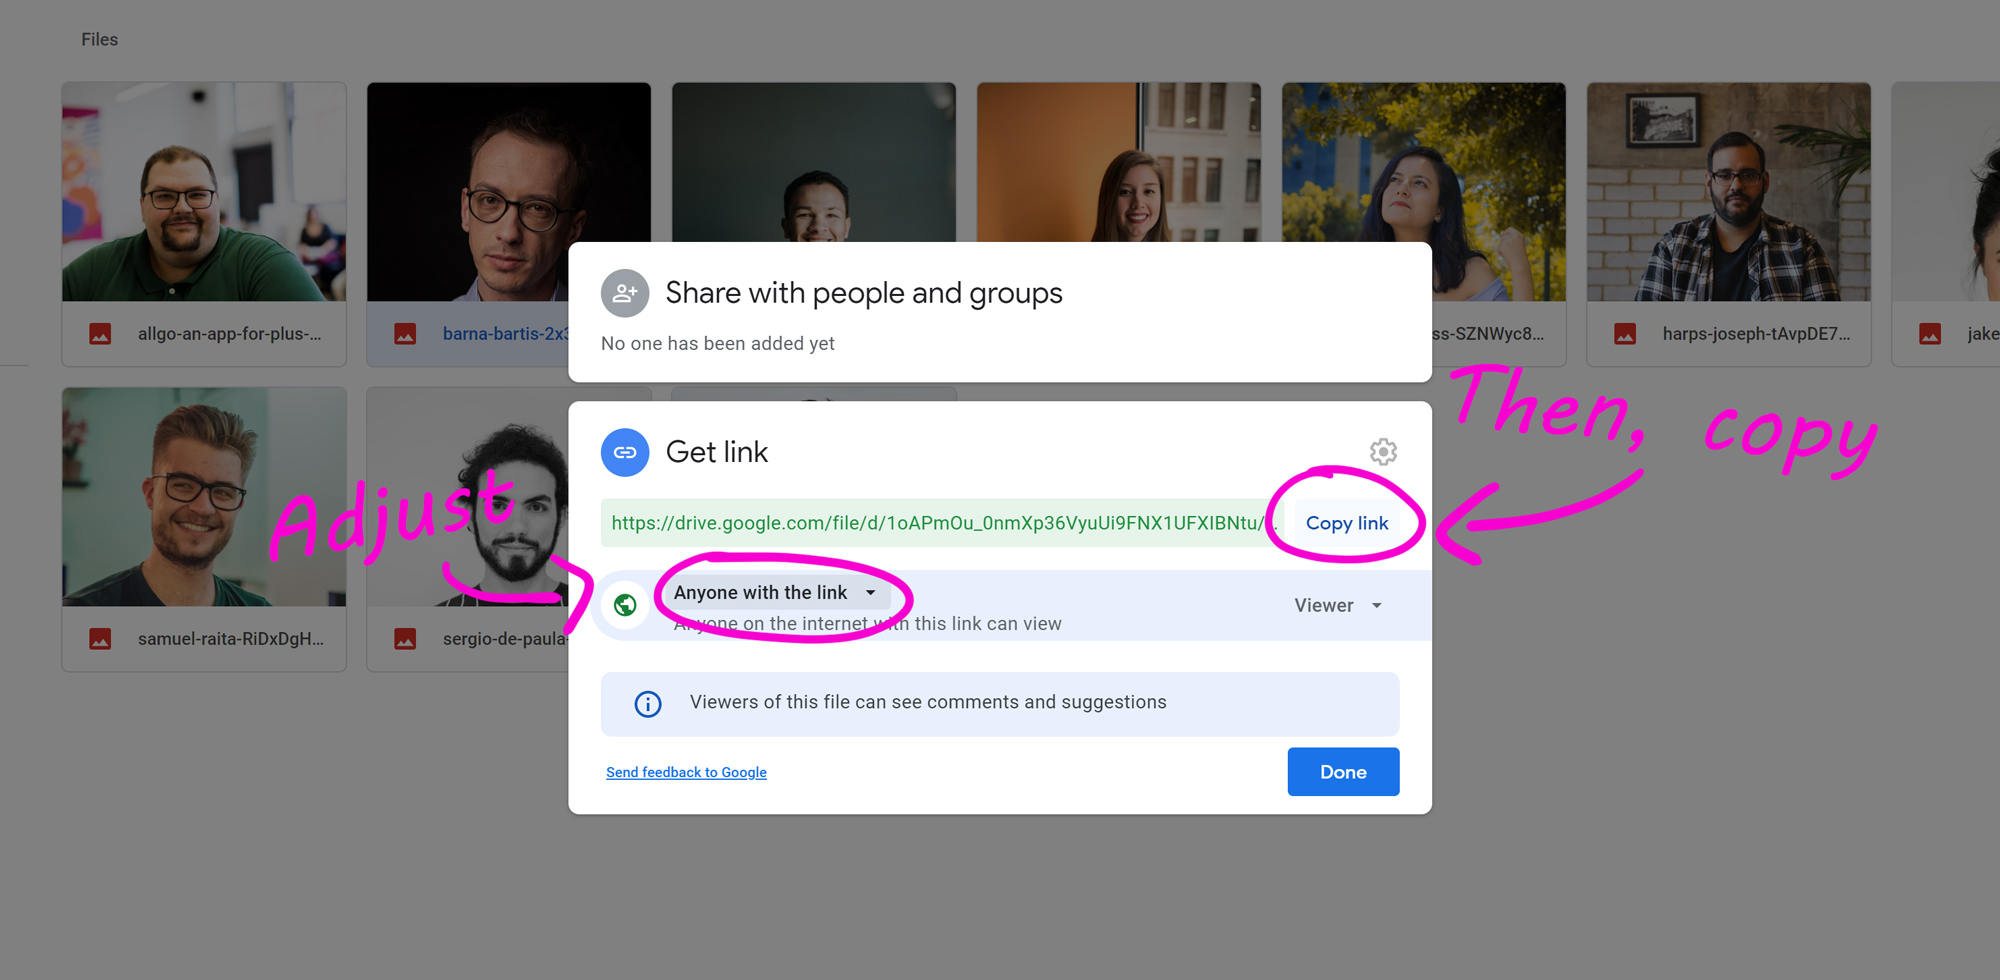
Next, to make the link publicly accessible, change the sharing policy from “Restricted” to “Anyone with the link”. Copy the link.
Get public image links from Dropbox (optional)
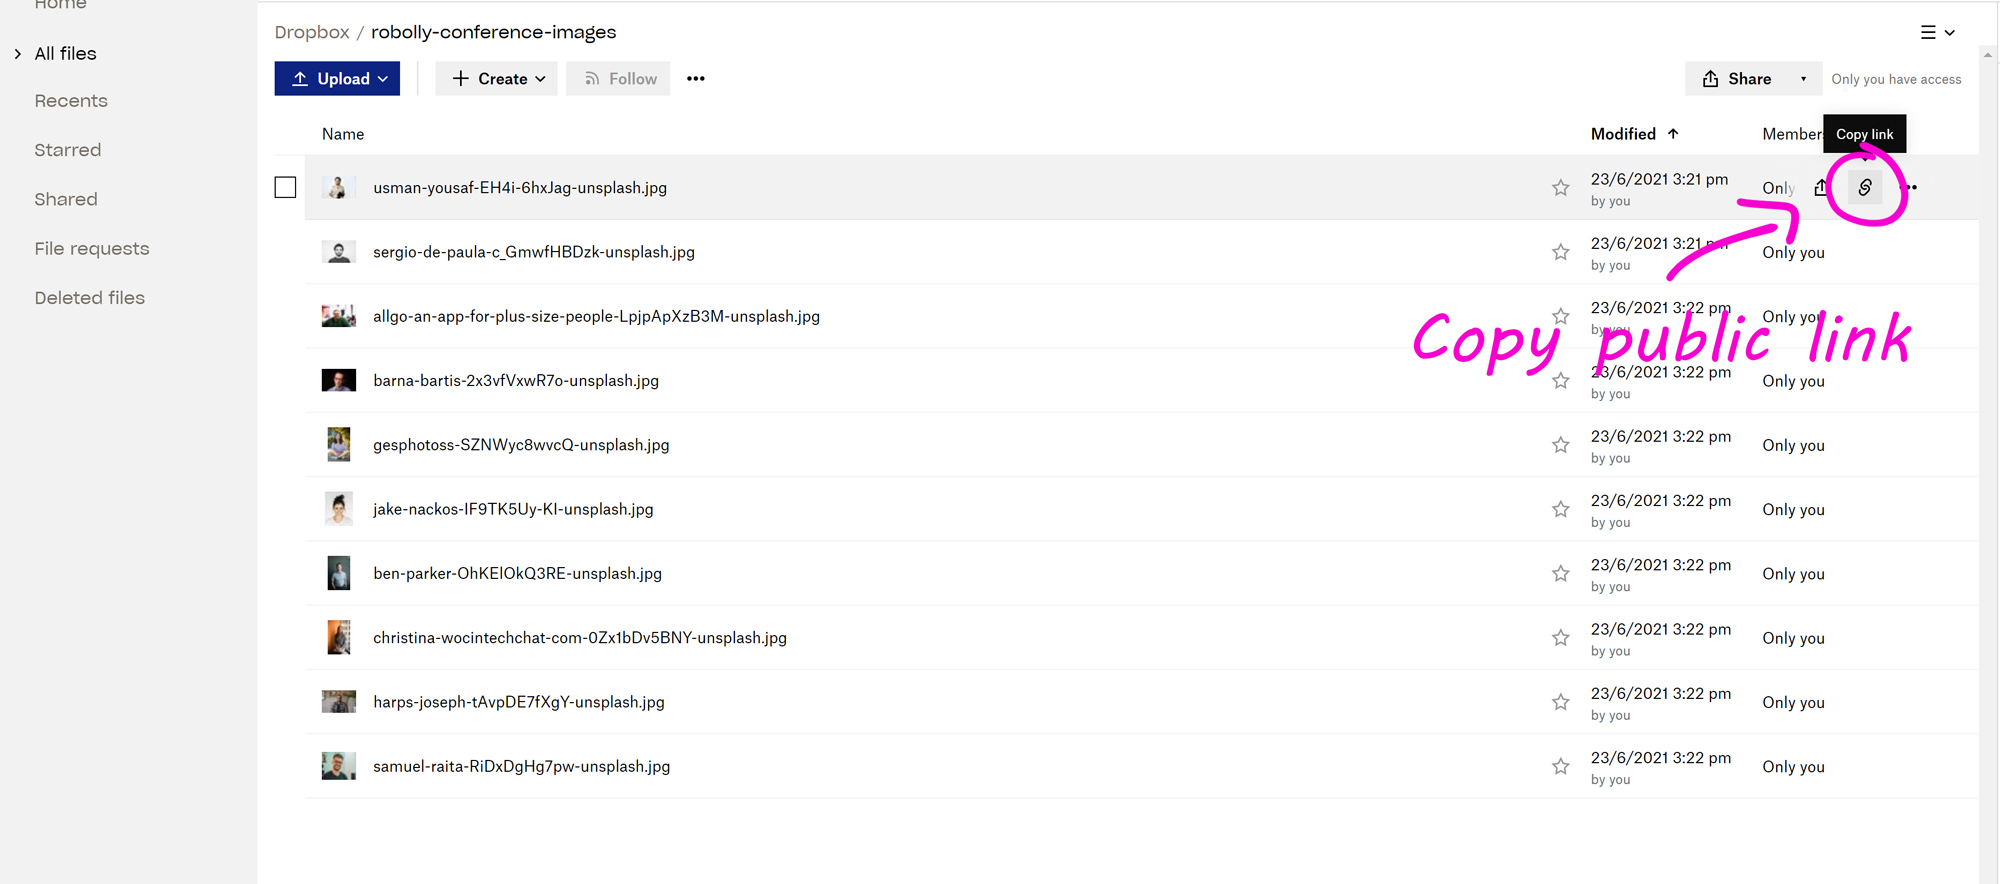
To get a public link to an image stored in Dropbox, hover over the image file and then click on the “Copy link” icon (next to the three dots icon) to copy the link.
Step 4: Putting it all together
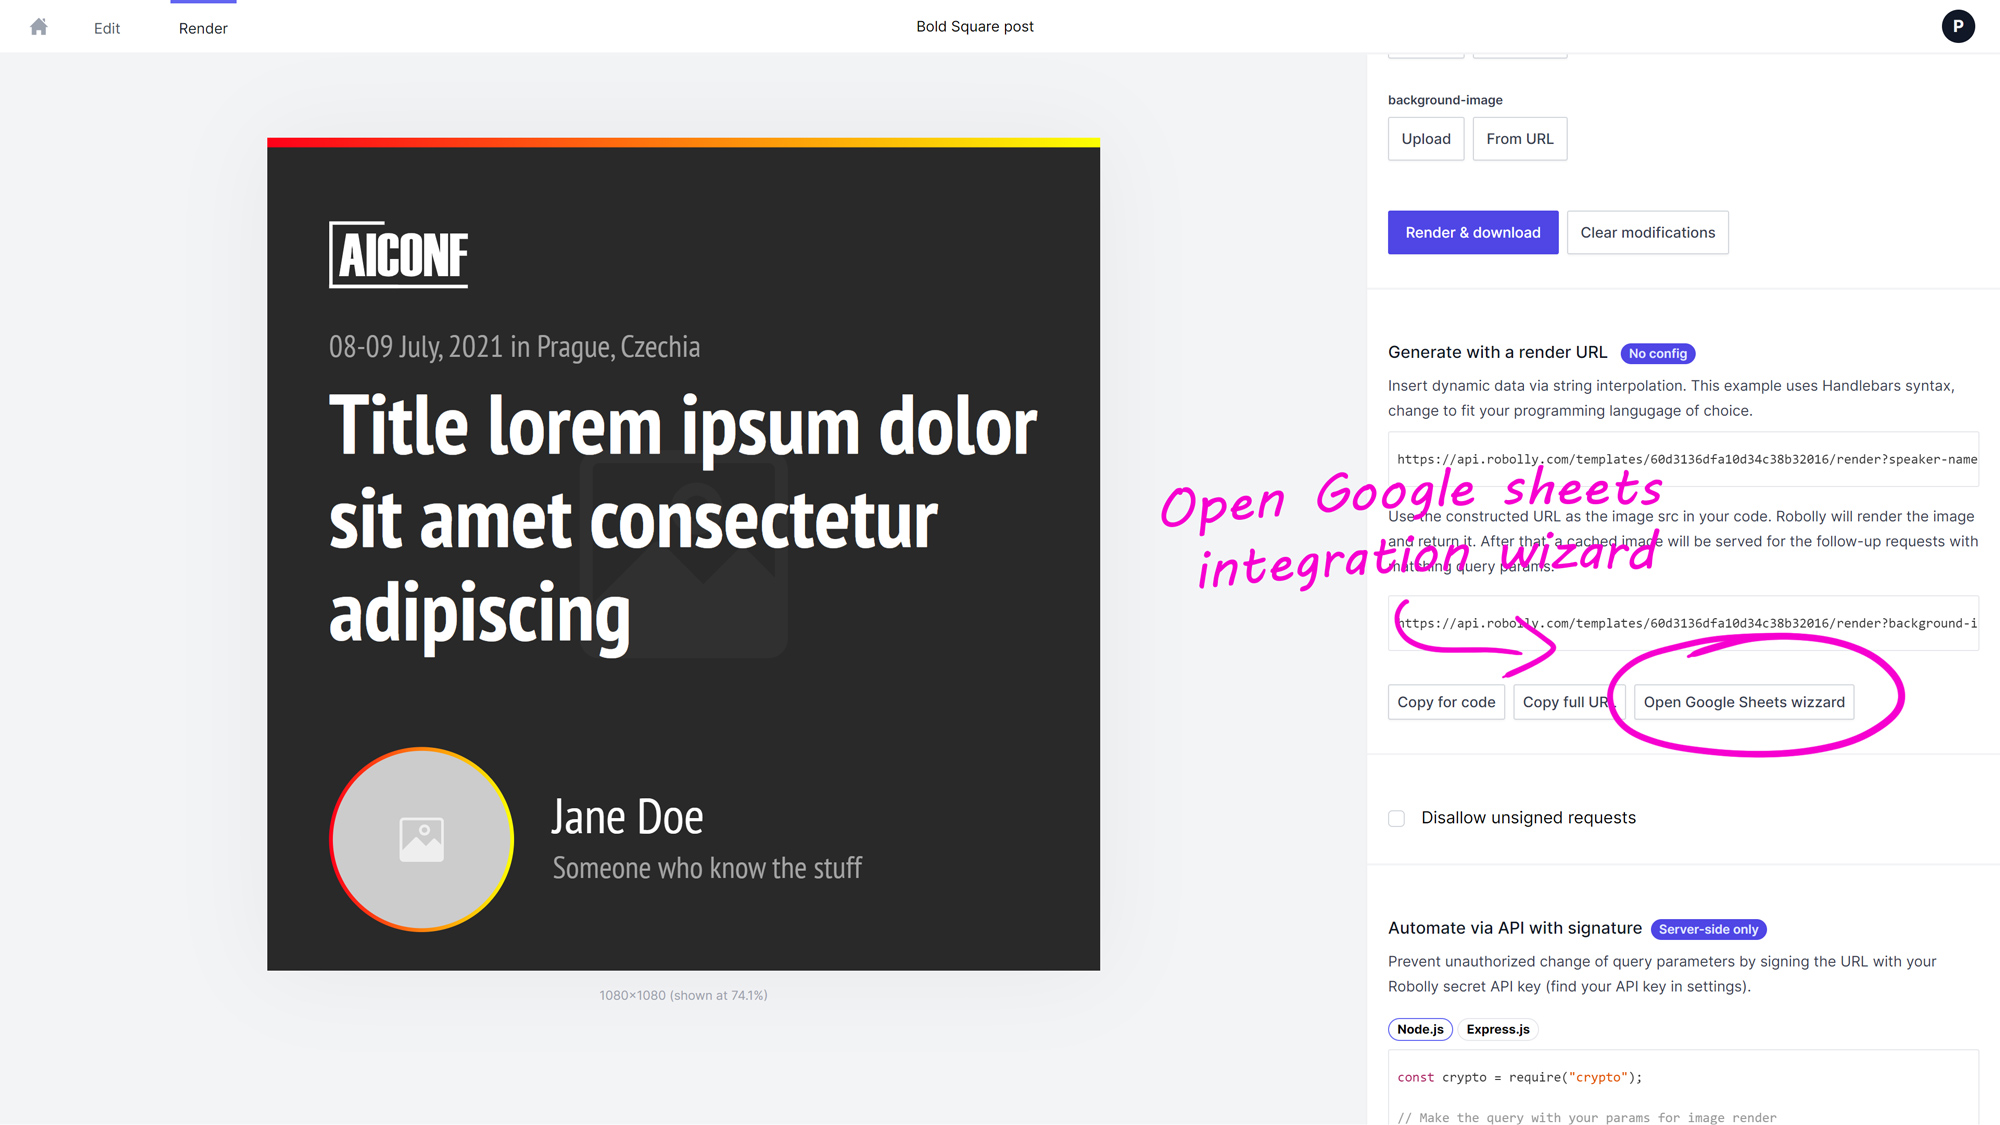
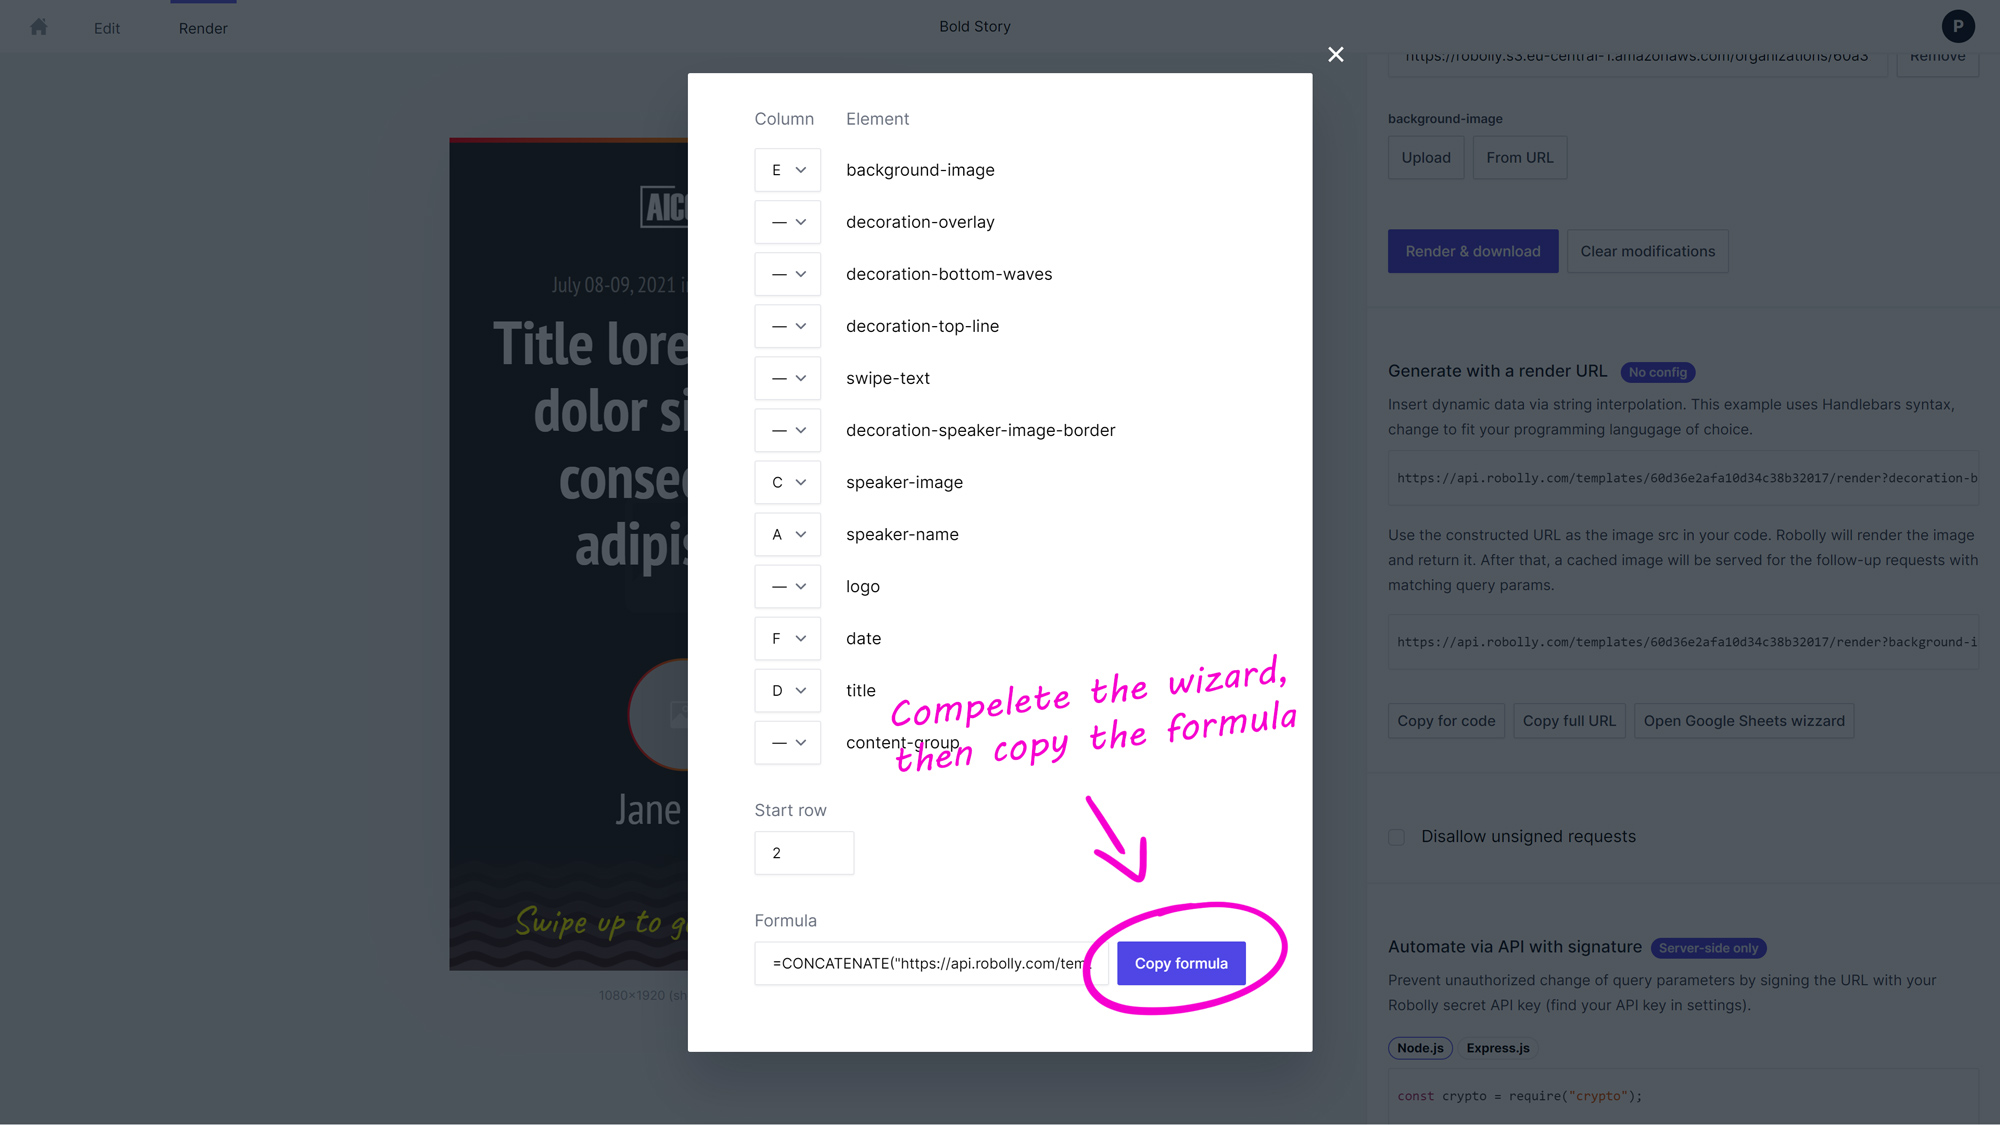
With data in the spreadsheet, now, it’s time to go back to your template’s (“Bold Square post”) render tab in Robolly to get the formula.
In the render tab, click on “Open Google sheets wizard”.
In the Google Sheets integration wizard, select the corresponding column letter-names for each of the modifiable template’s elements (for “title” it’s column D, for “date” it’s column F, etc).
After you’re finished, copy the generated formula.
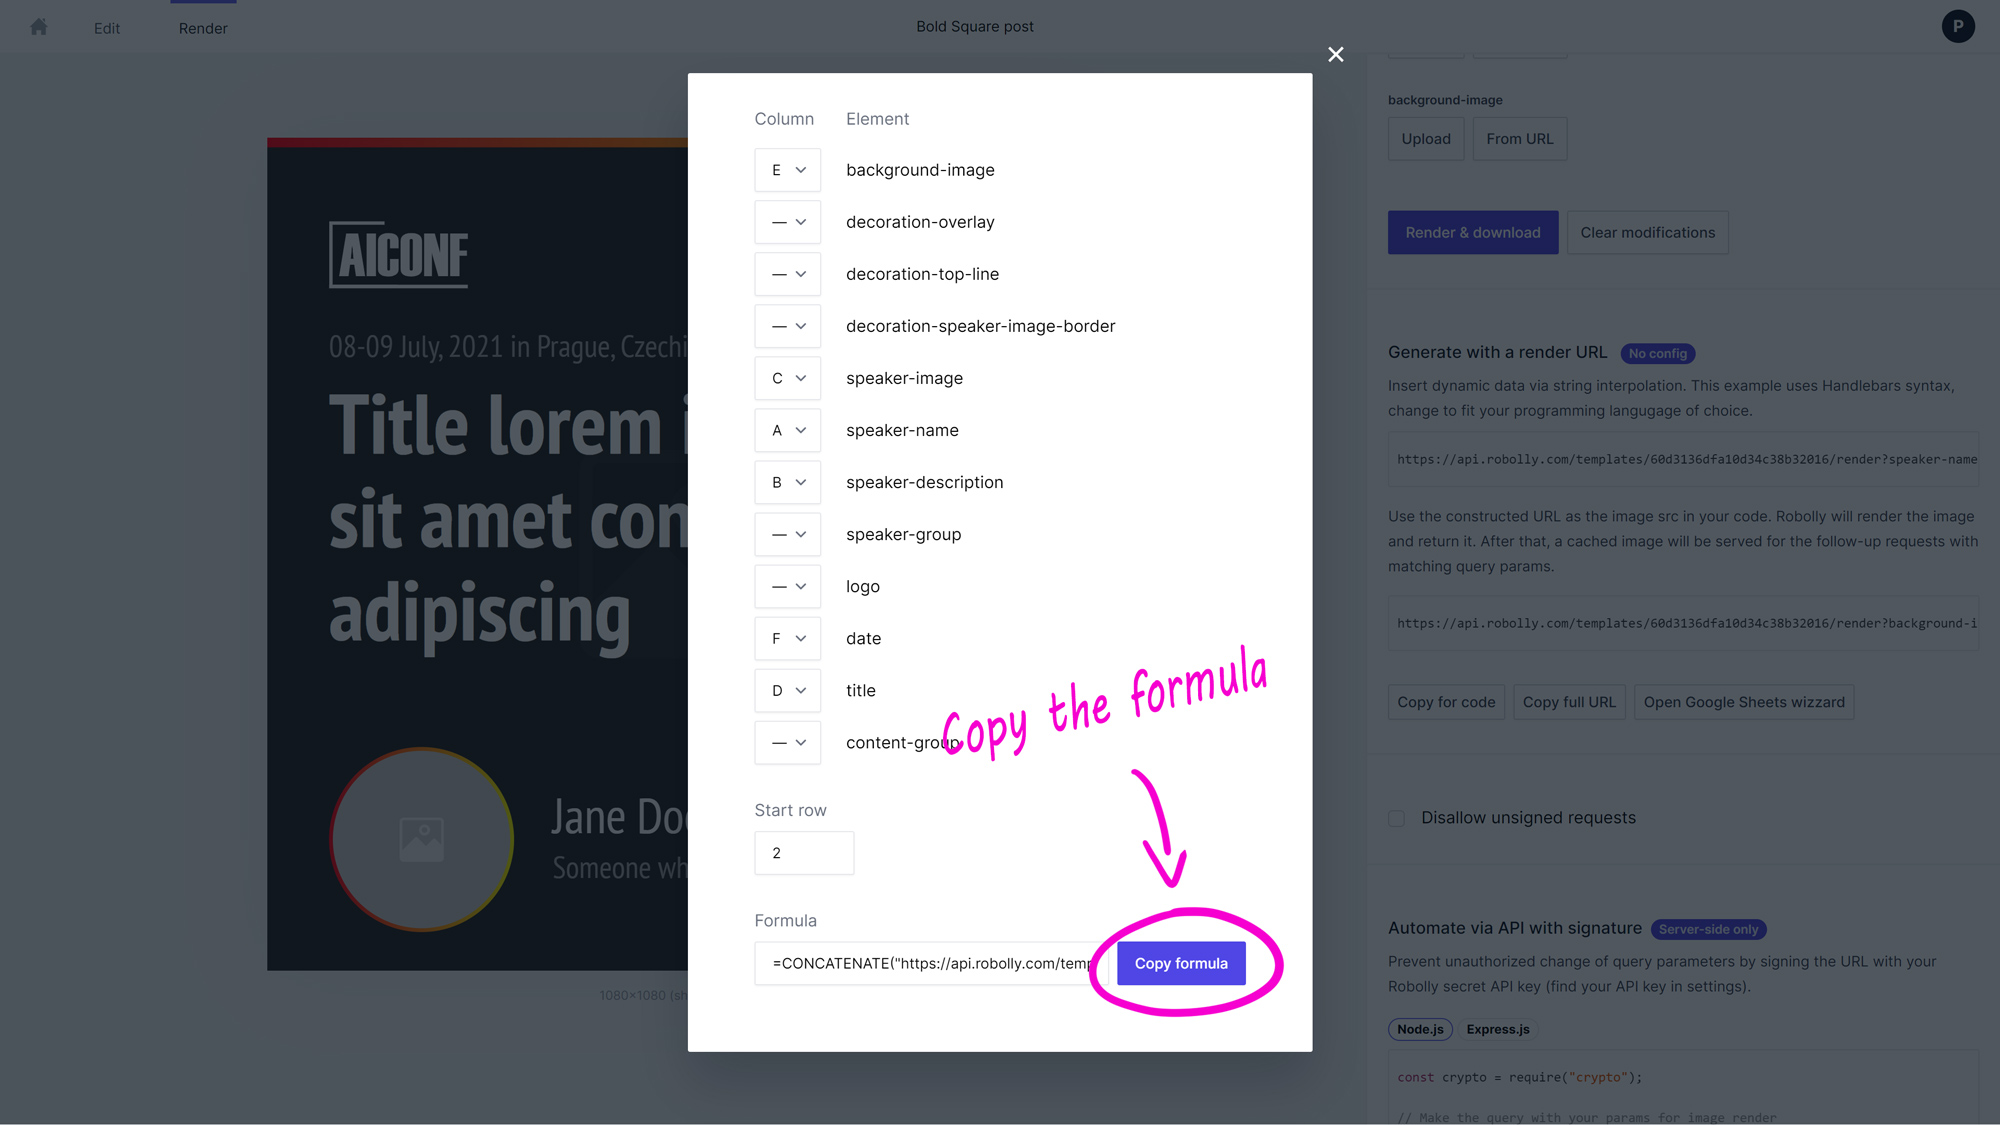
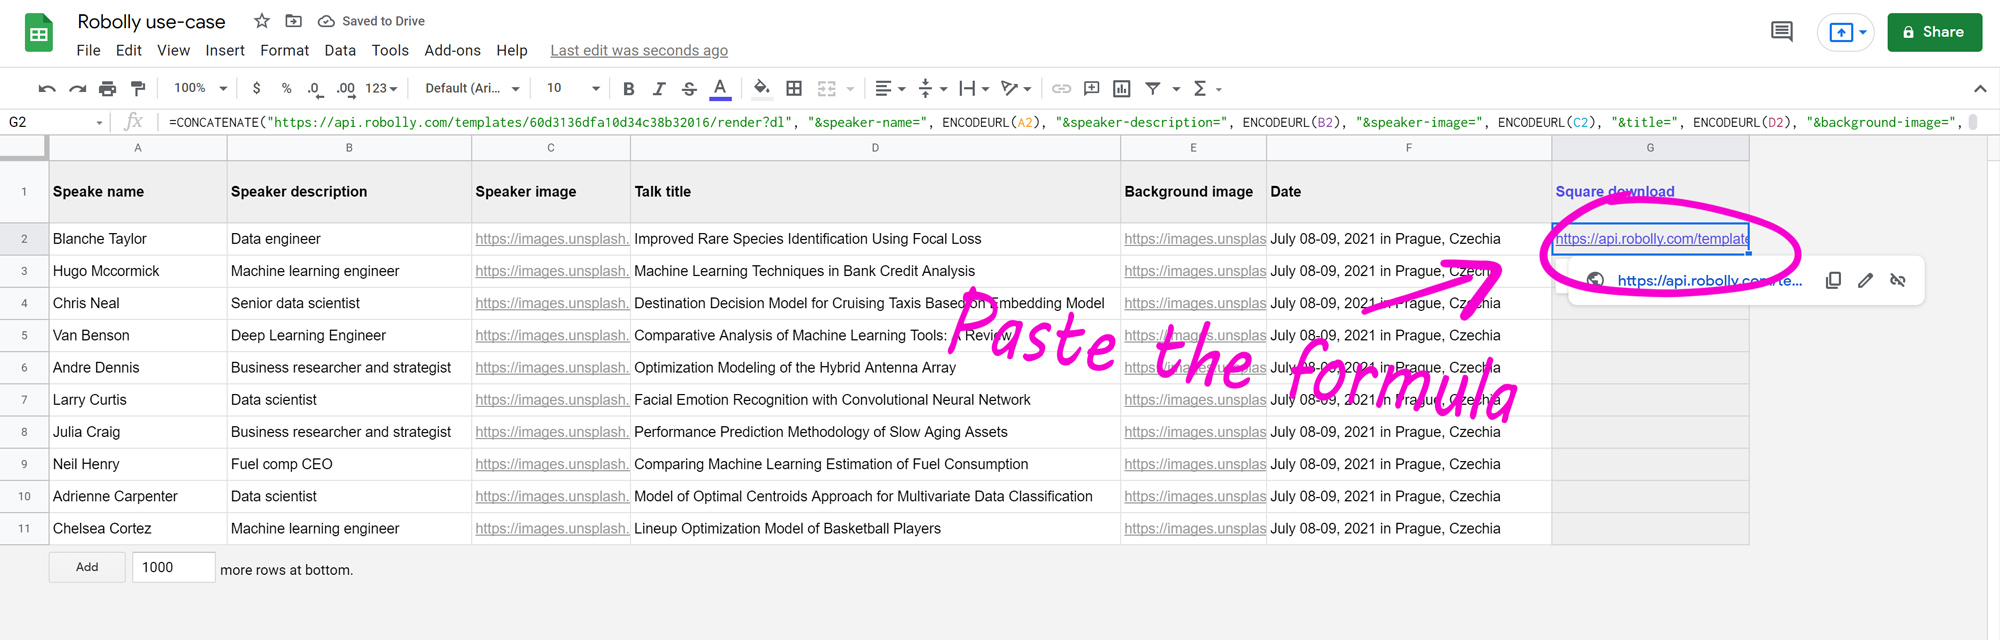
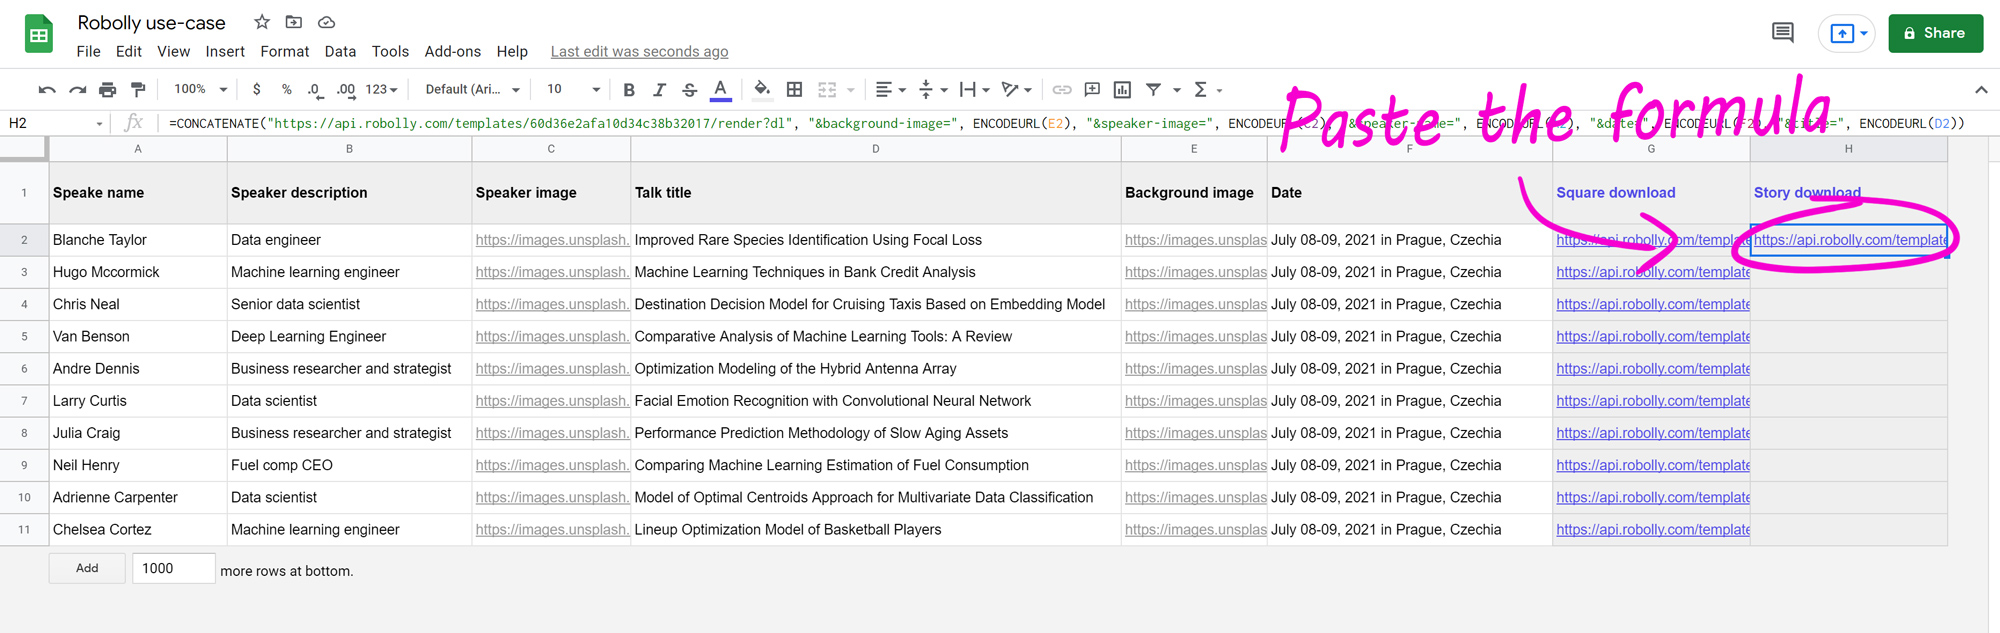
Switch back to the spreadsheet, and paste the formula into G2 (or whichever cell that is the first row at an appropriate download column).
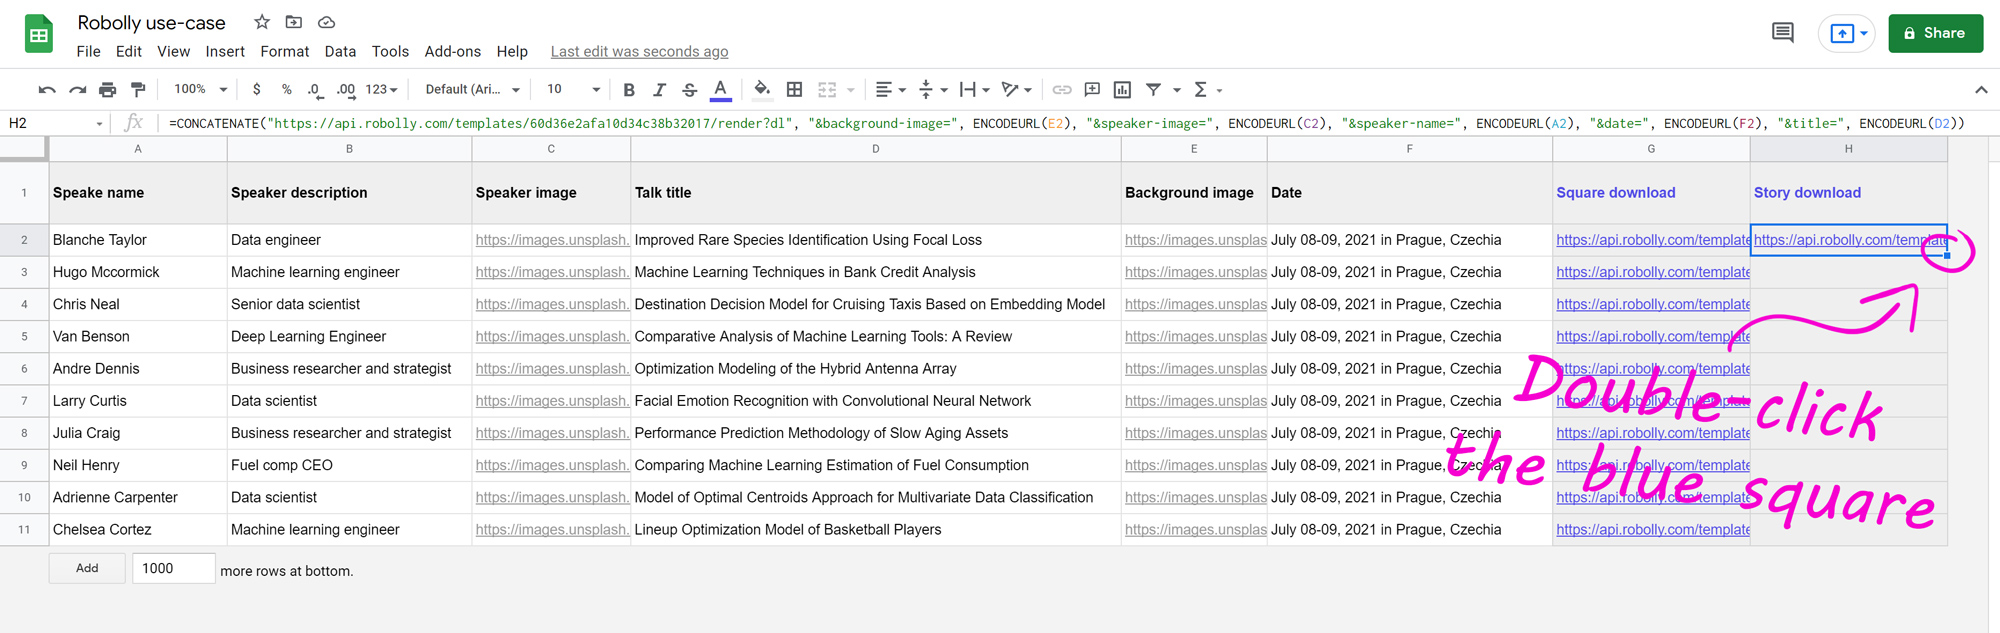
Then, to auto-apply the formula across all cells in the download column, select the G2 cell, and double click on the little blue square in the right bottom corner.
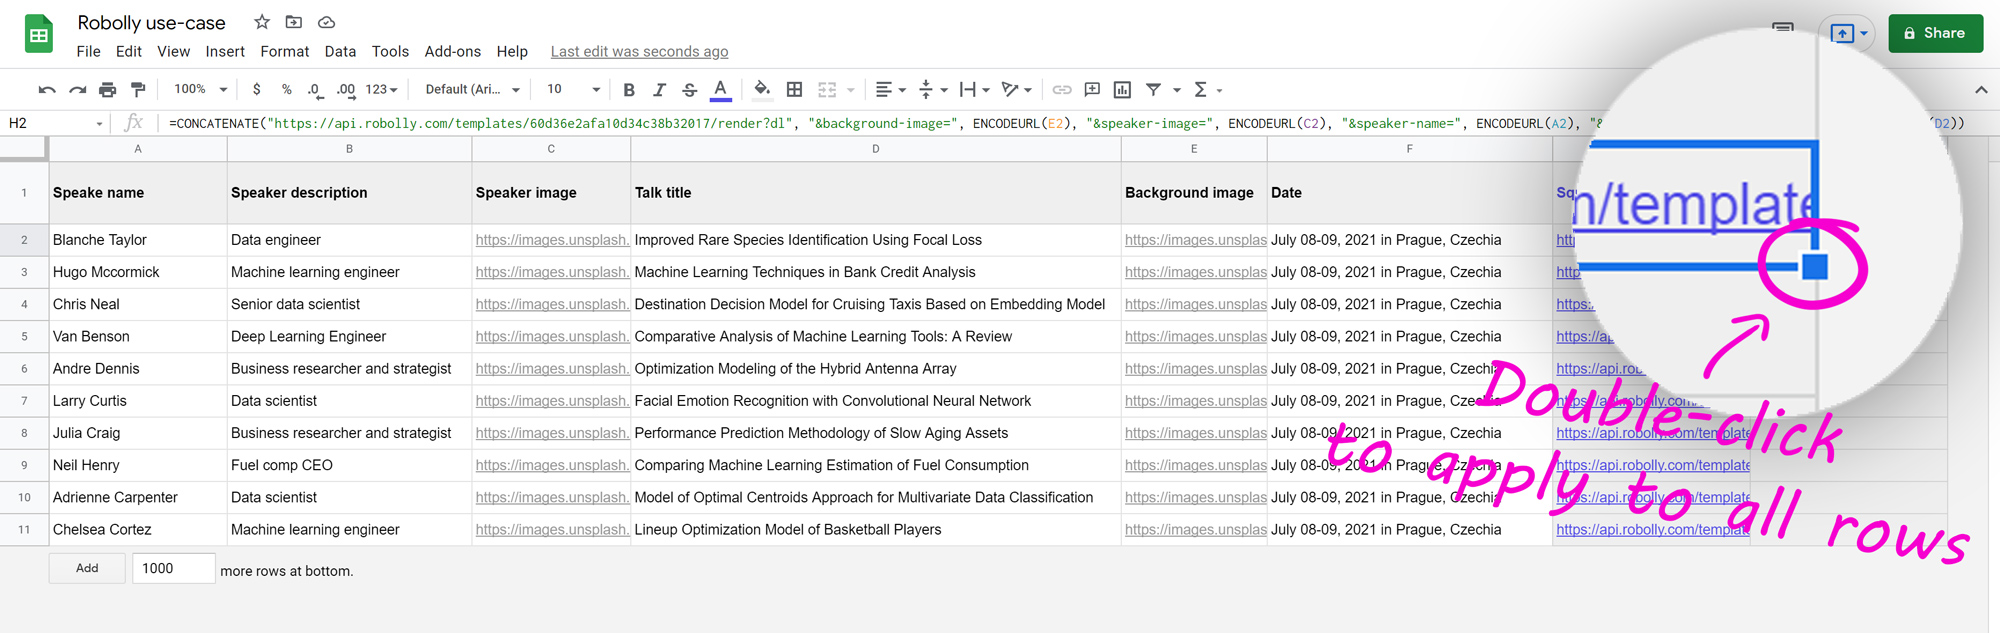
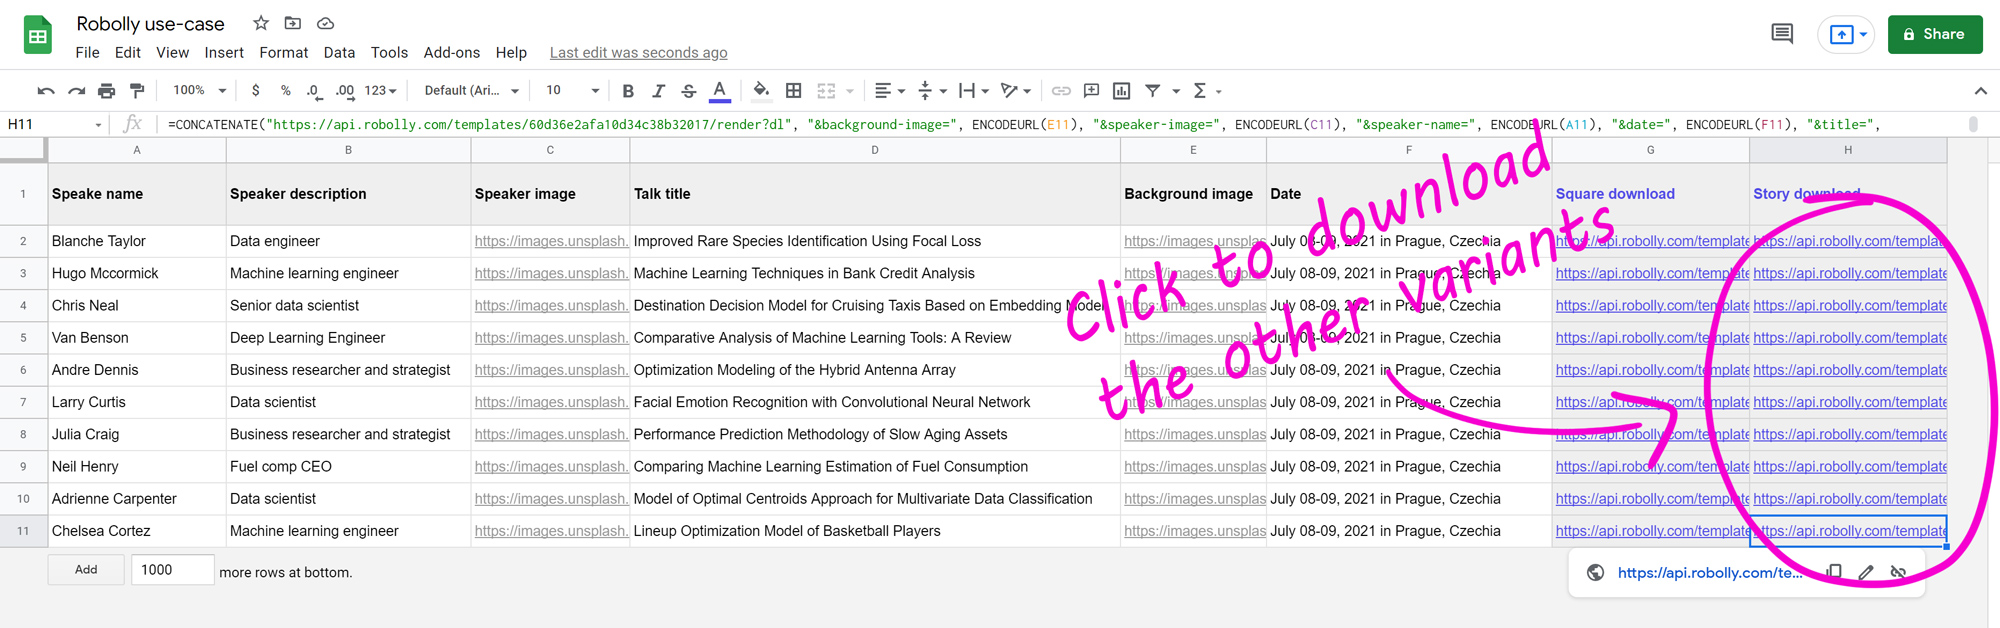
After that, all filled rows should have a render link in the download column.
And that’s it, the setup for the first variant is completed!
Now, you can simply click on the render links to download images that will be rendered on the fly based on the template and the data from the respective row (a trick to speed up downloading all images is opening the render links in new tabs, I prefer the scroll-wheel click).
Setting up multiple variants
Let’s add the other variant (Instagram Story variant). To do that, all we have to do is to prepare a template in Robolly and repeat the process described in step 4 (adding a new column and using formula to get the render links).
Start by importing the “Bold Story” template from Robolly’s template gallery (alternatively, if you’re not following the conference example, prepare the template you want to use in Robolly).
In the template’s (“Bold Story”) render tab, click “Open Google Sheets wizard”.

Once again, use the Google sheets integration wizard to get the formula.
Back to the spreadsheet, create a new column to the right of the download column (I named it “Story download”).
Then, paste the formula:
Then, auto-apply the formula to all cells in the column by selecting H2 and double-clicking on the blue square in the bottom right corner.
With formula applied, you should see the render links across all rows (click on the render link to start the download to check that everything is working).
That’s it! Now you can create promo images in two variants just by adding data into the spreadsheet and clicking on the render links to download them. You can take it even further and add a third, fourth, and fifth variant (or more by repeating the process described in this section).
Wrapping up
By automating the previously manually intensive process, you’ll benefit from lower costs, less time spent on repetitive work, brand recognition through consistency, and more marketing possibilities on scale.
A theme of this guide was producing marketing images for a conference event, but you can benefit from using image automation for many other use-cases (such as branded news content; podcast graphics; testimonials; quotes; real estate banners; e-commerce banners; job listings; and more).